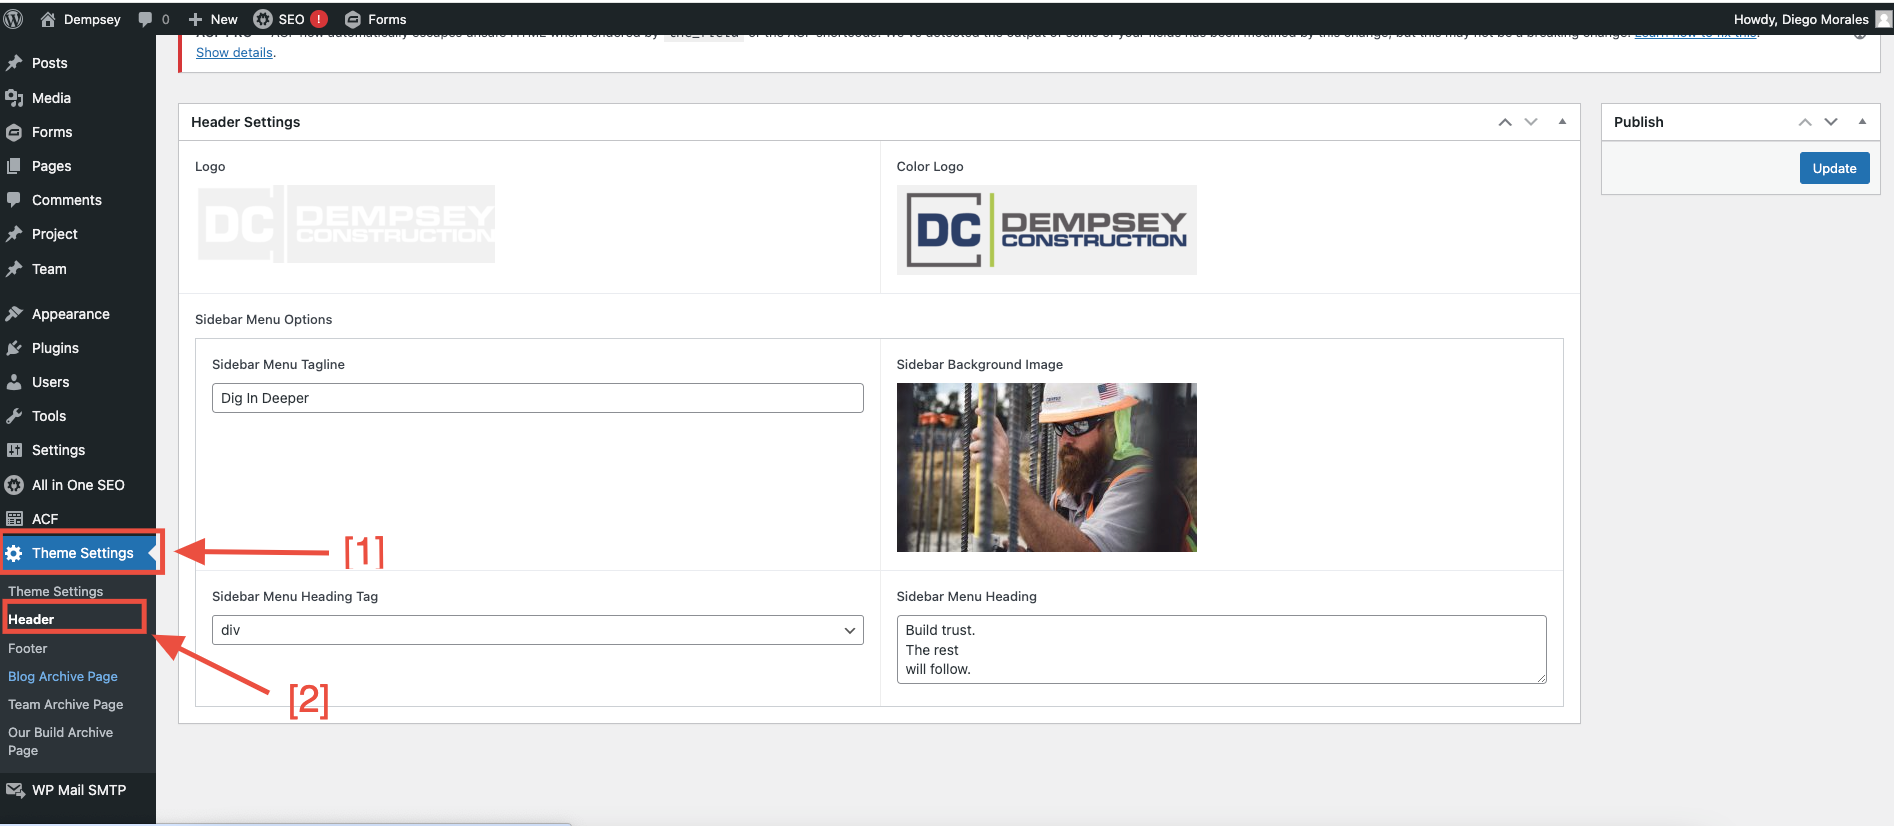
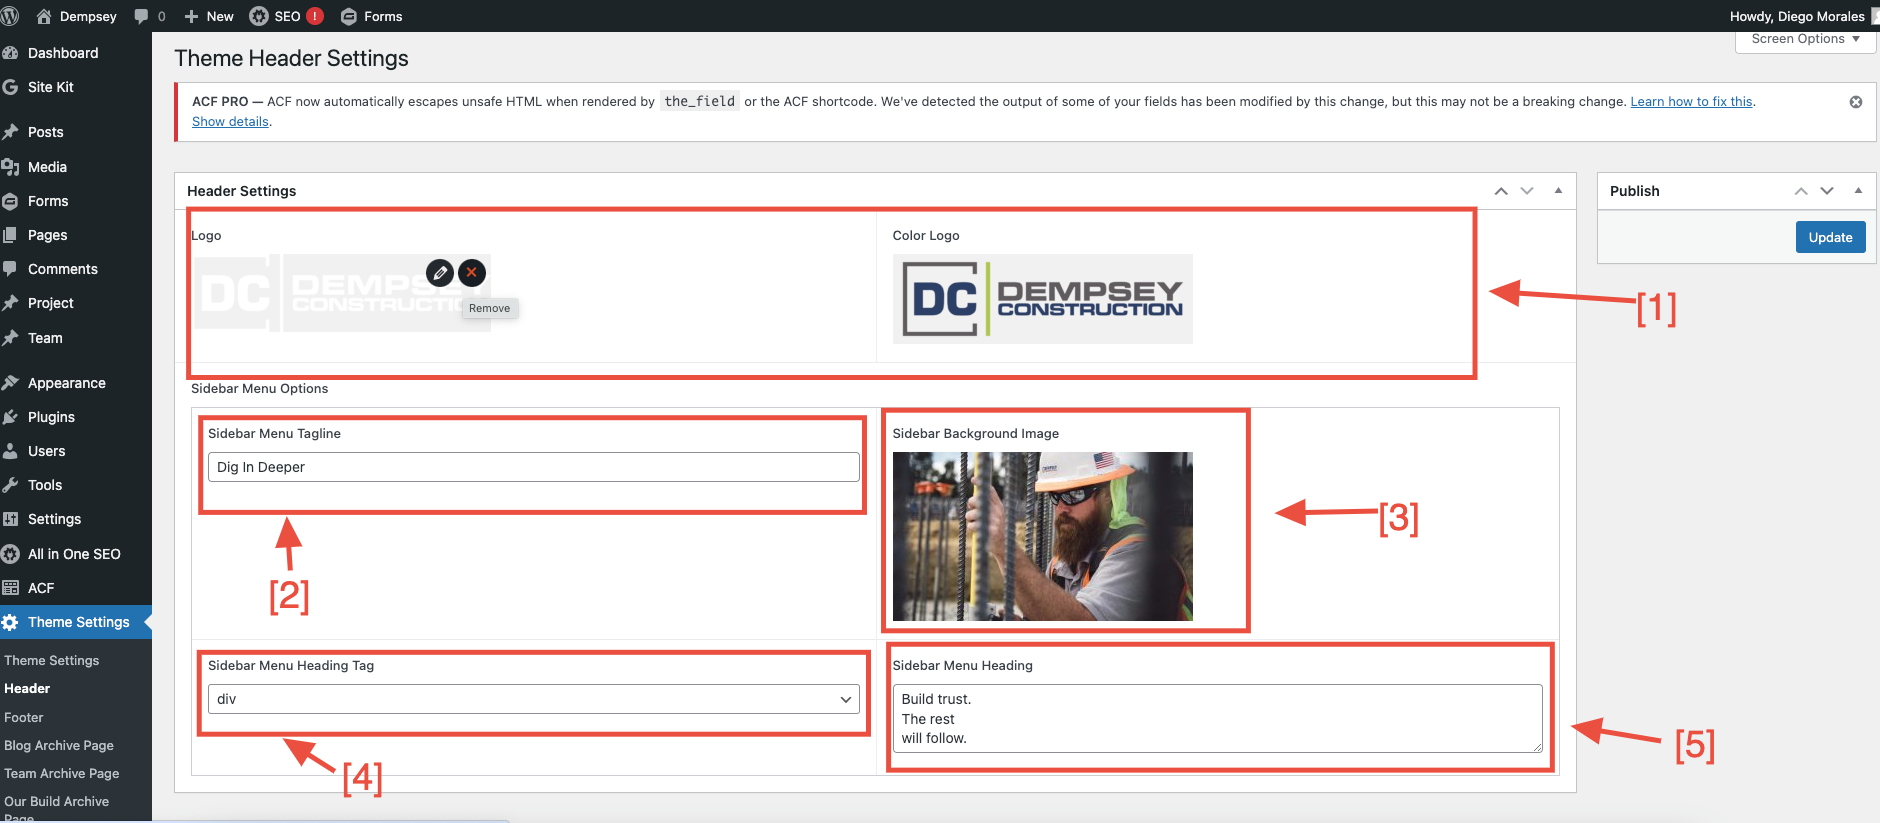
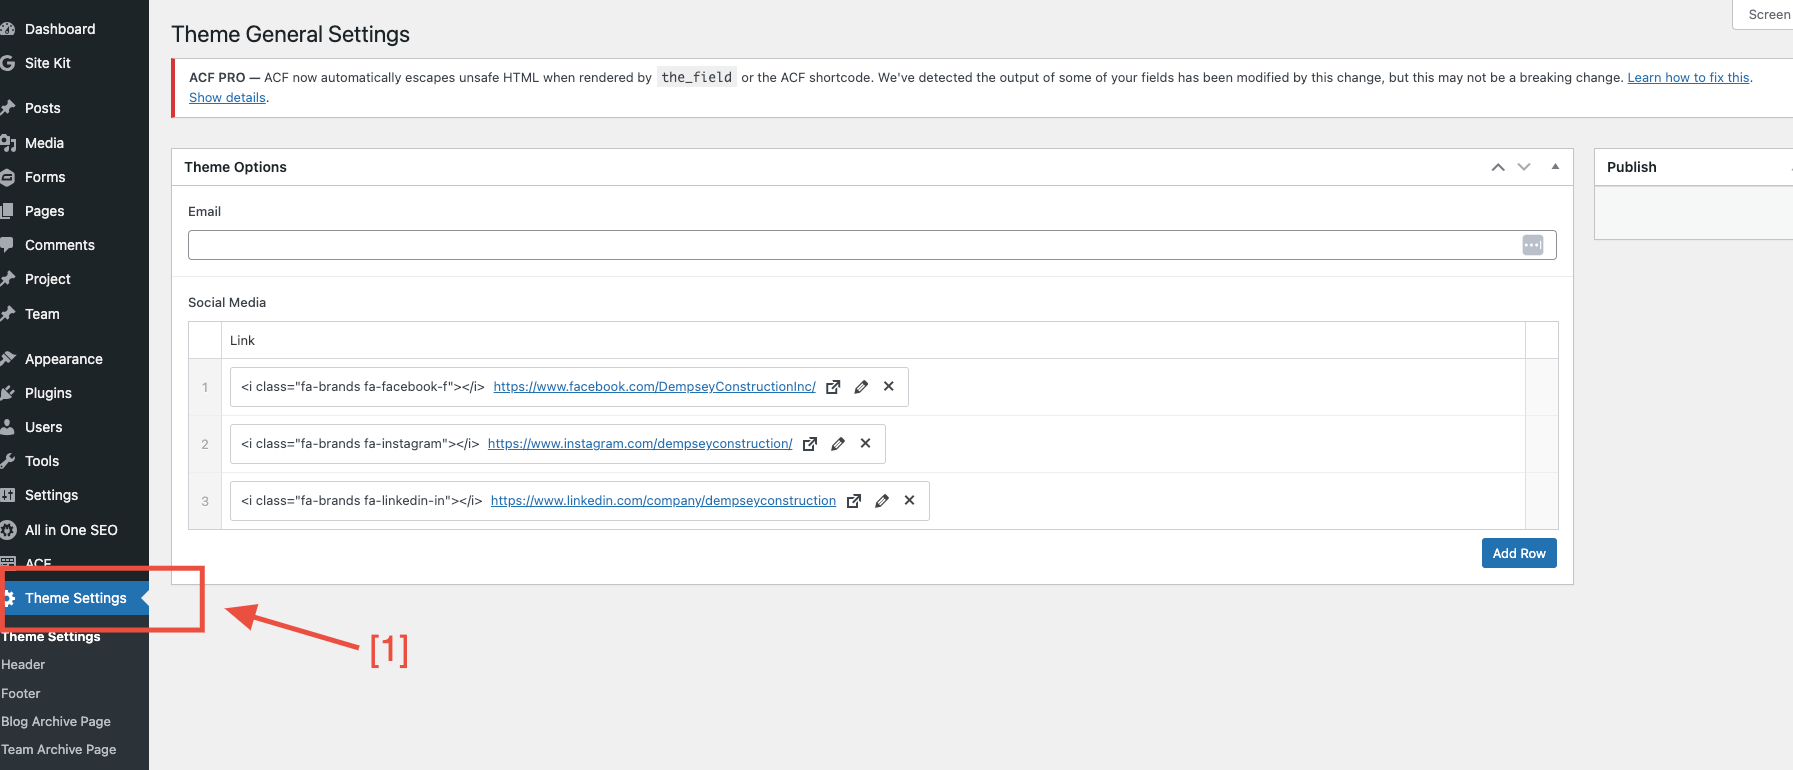
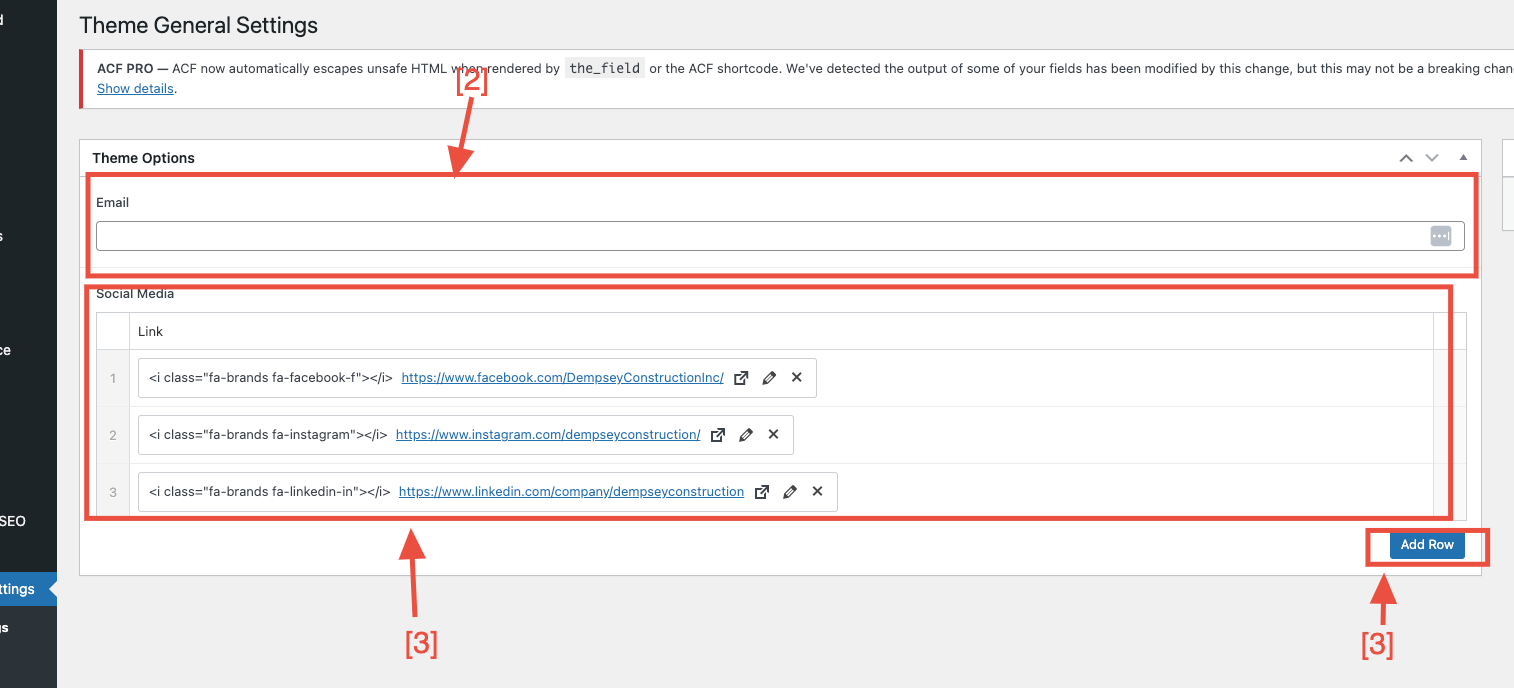
Theme Settings
Global Settings
Steps
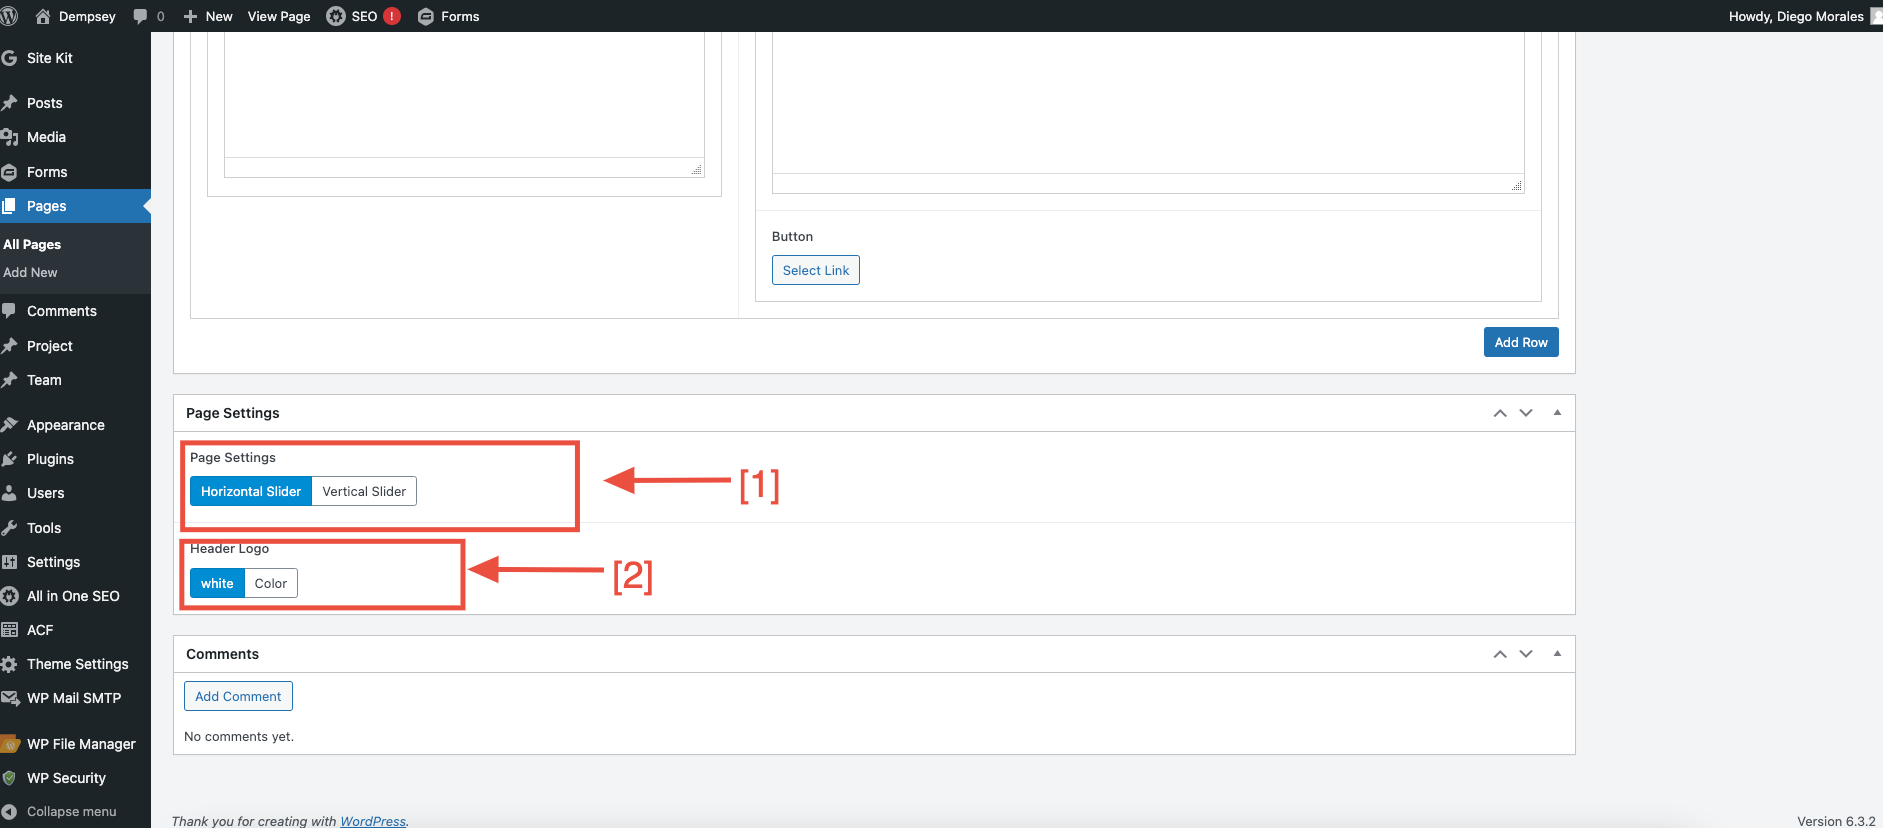
- Select the button group option to display your slider vertically or horizontally.
View Example
- Select the button group option to change the logo color.
View Example
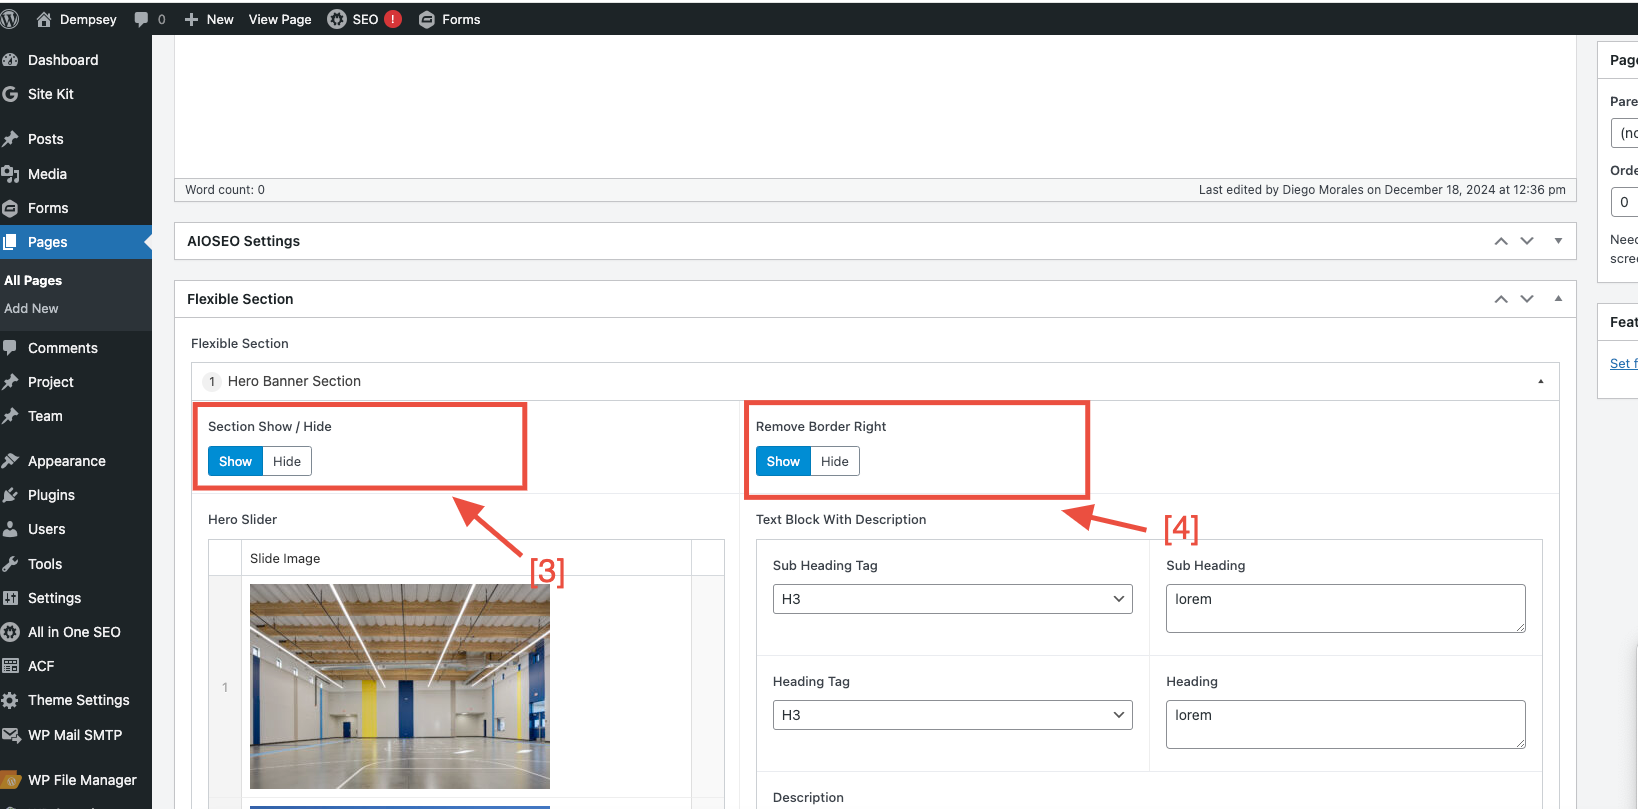
- Select the button group option to show or hide sections.
- Select the button group option to remove the right border.
View Example
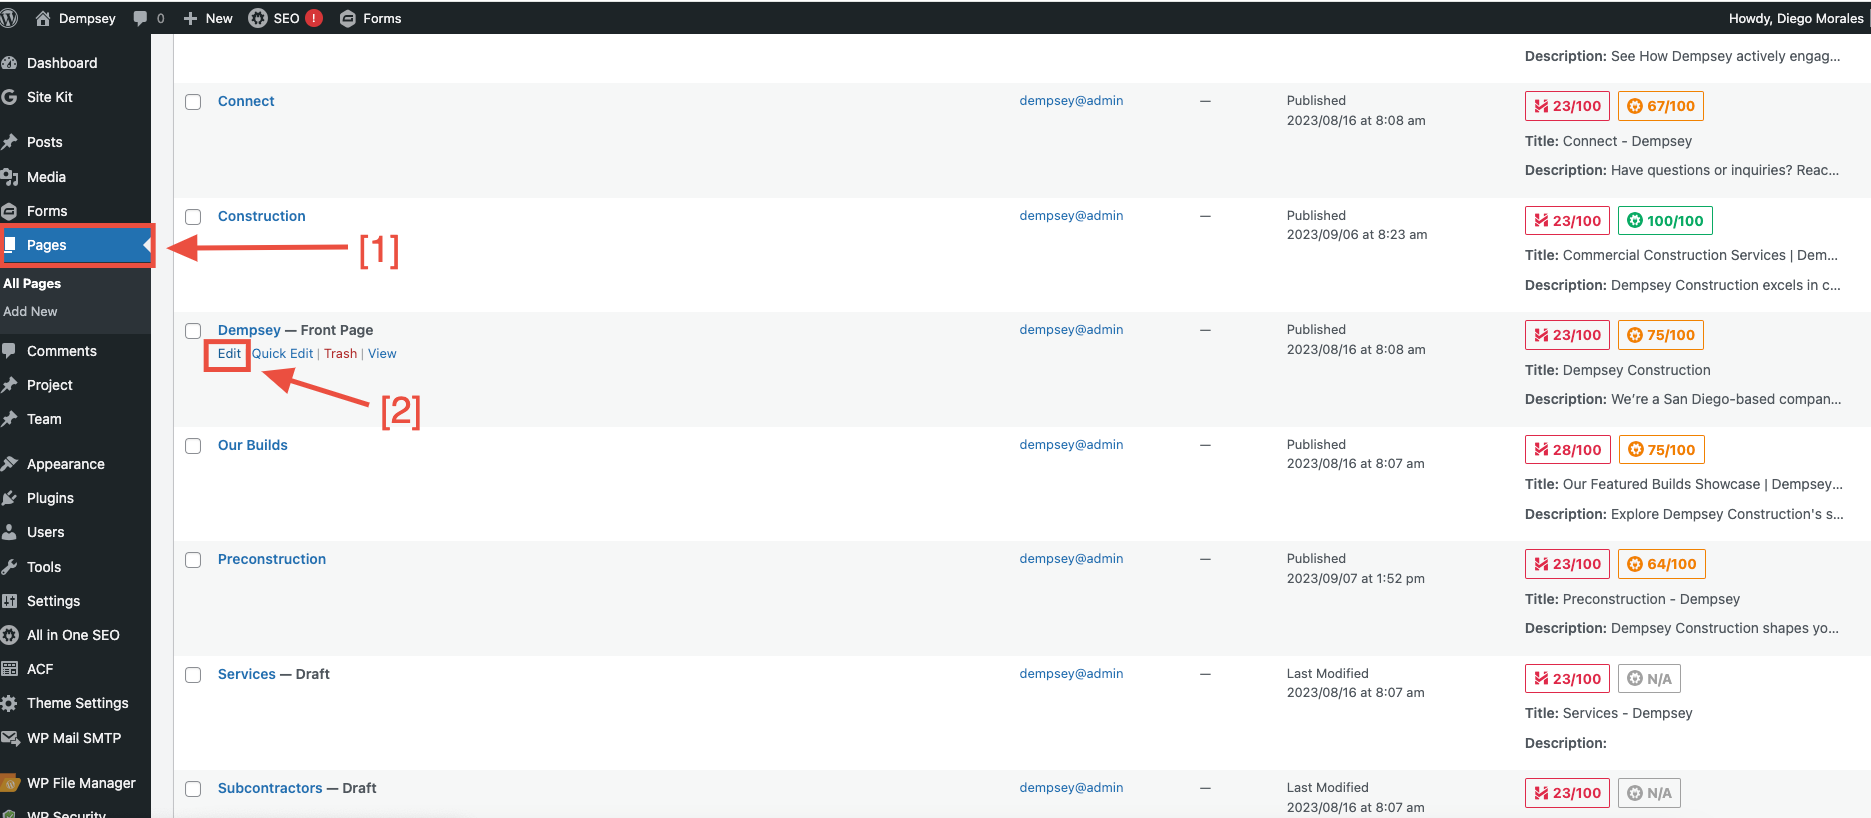
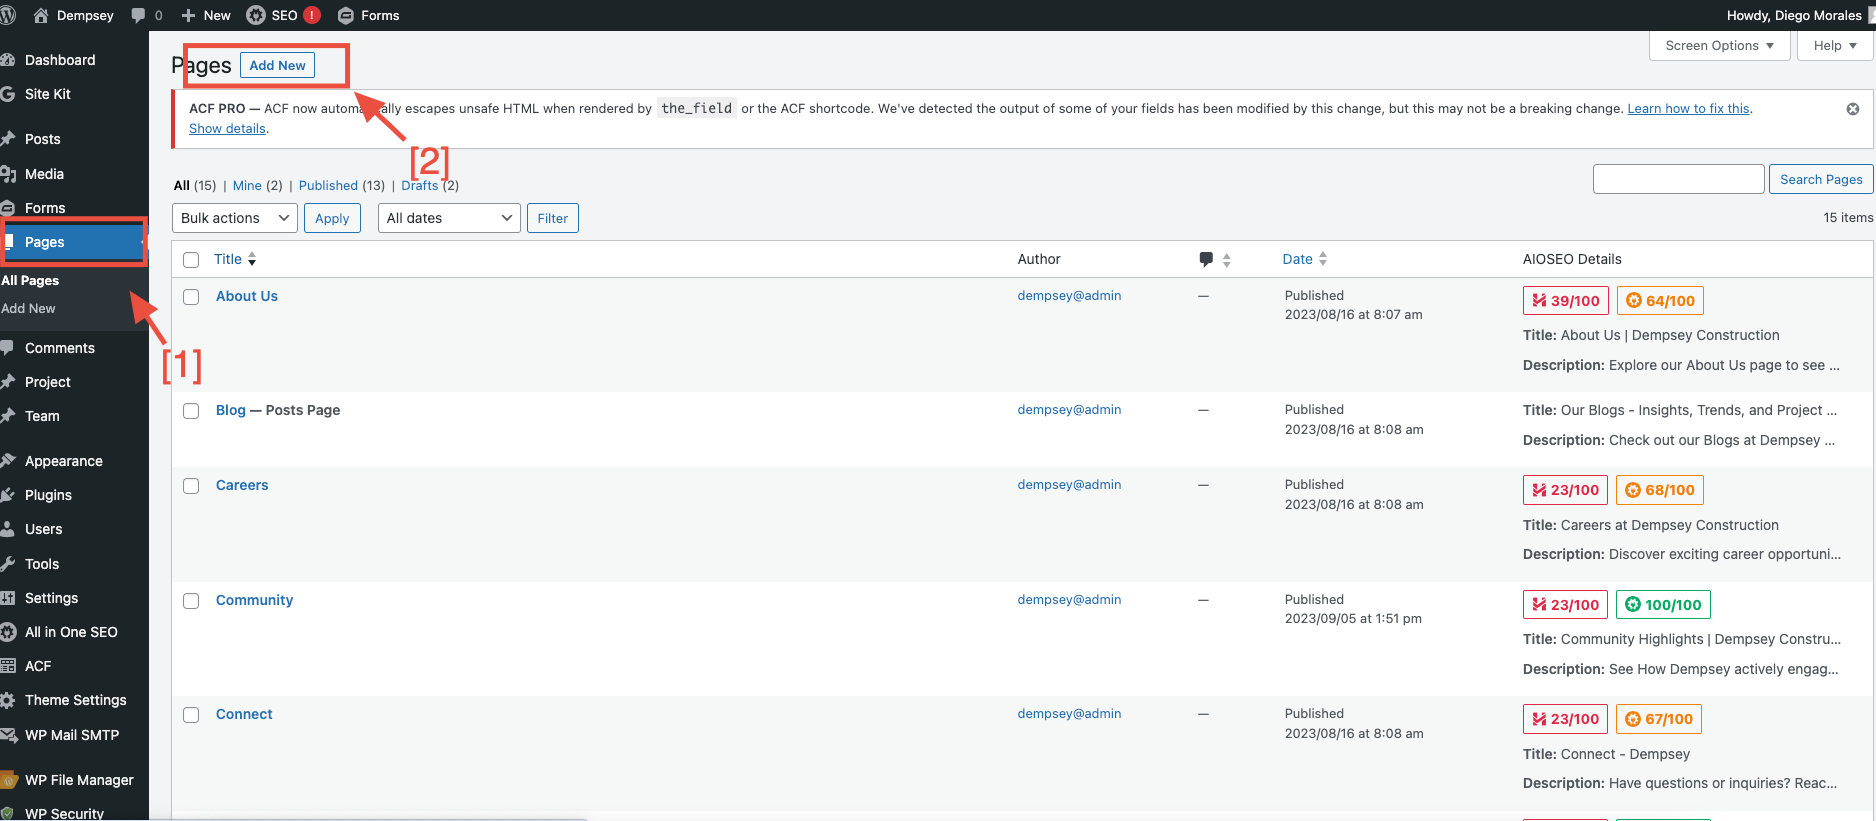
Pages
Home Page
Steps
- Click on "Pages".
- Click on "Edit" to make changes to the homepage.
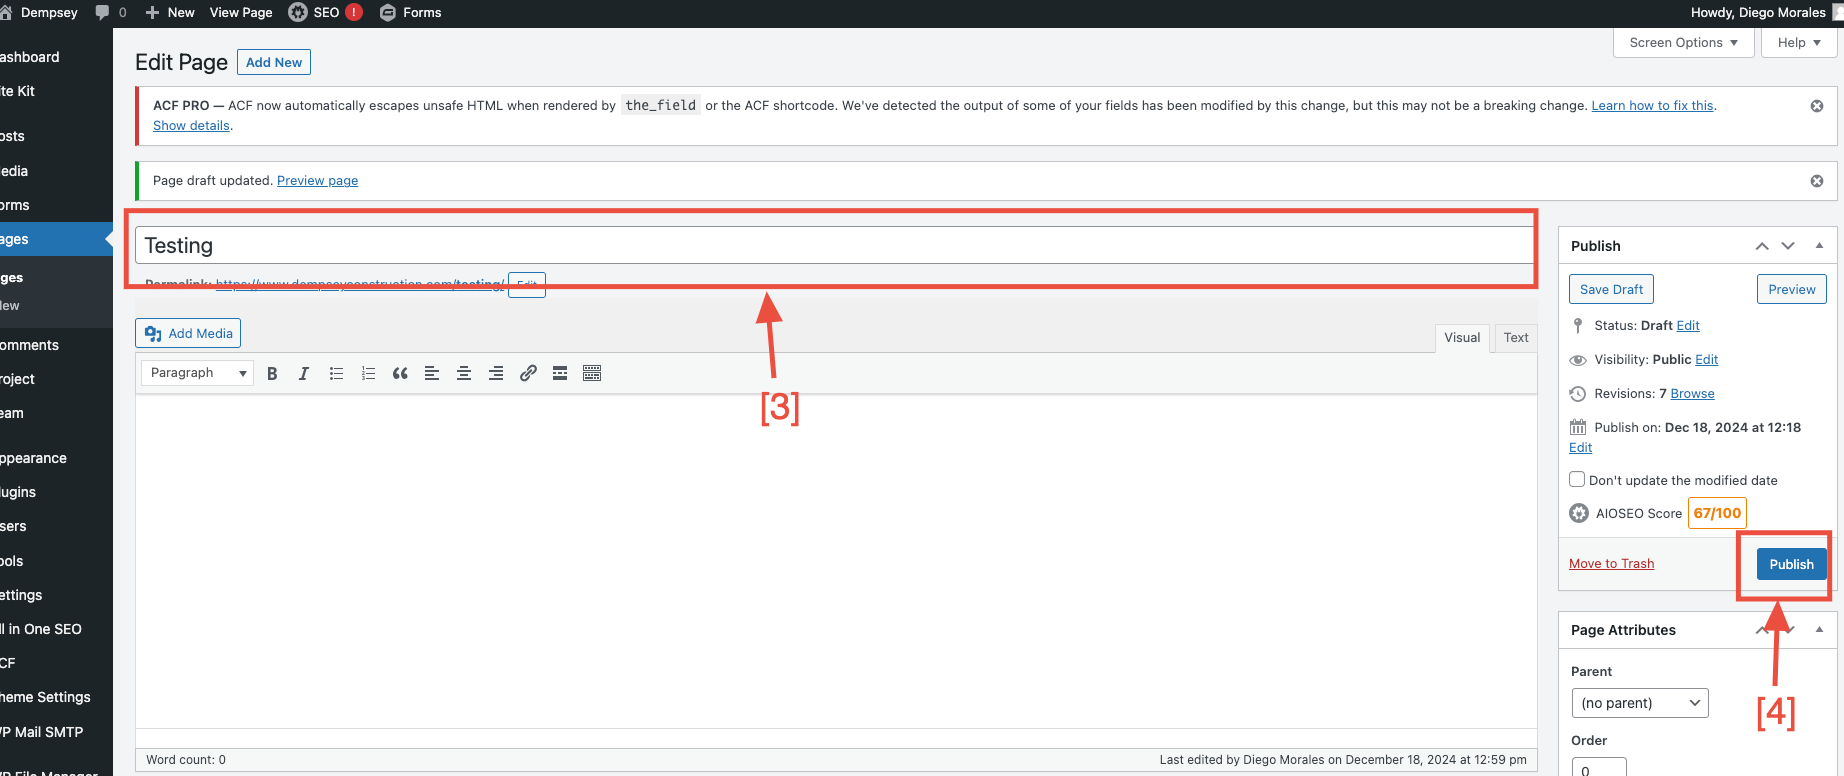
How to Add a New Page
Steps
- Click on "Pages".
- Click on "Add New".
- Enter your page title in the text area.
- Click the "Publish" button to publish your page.
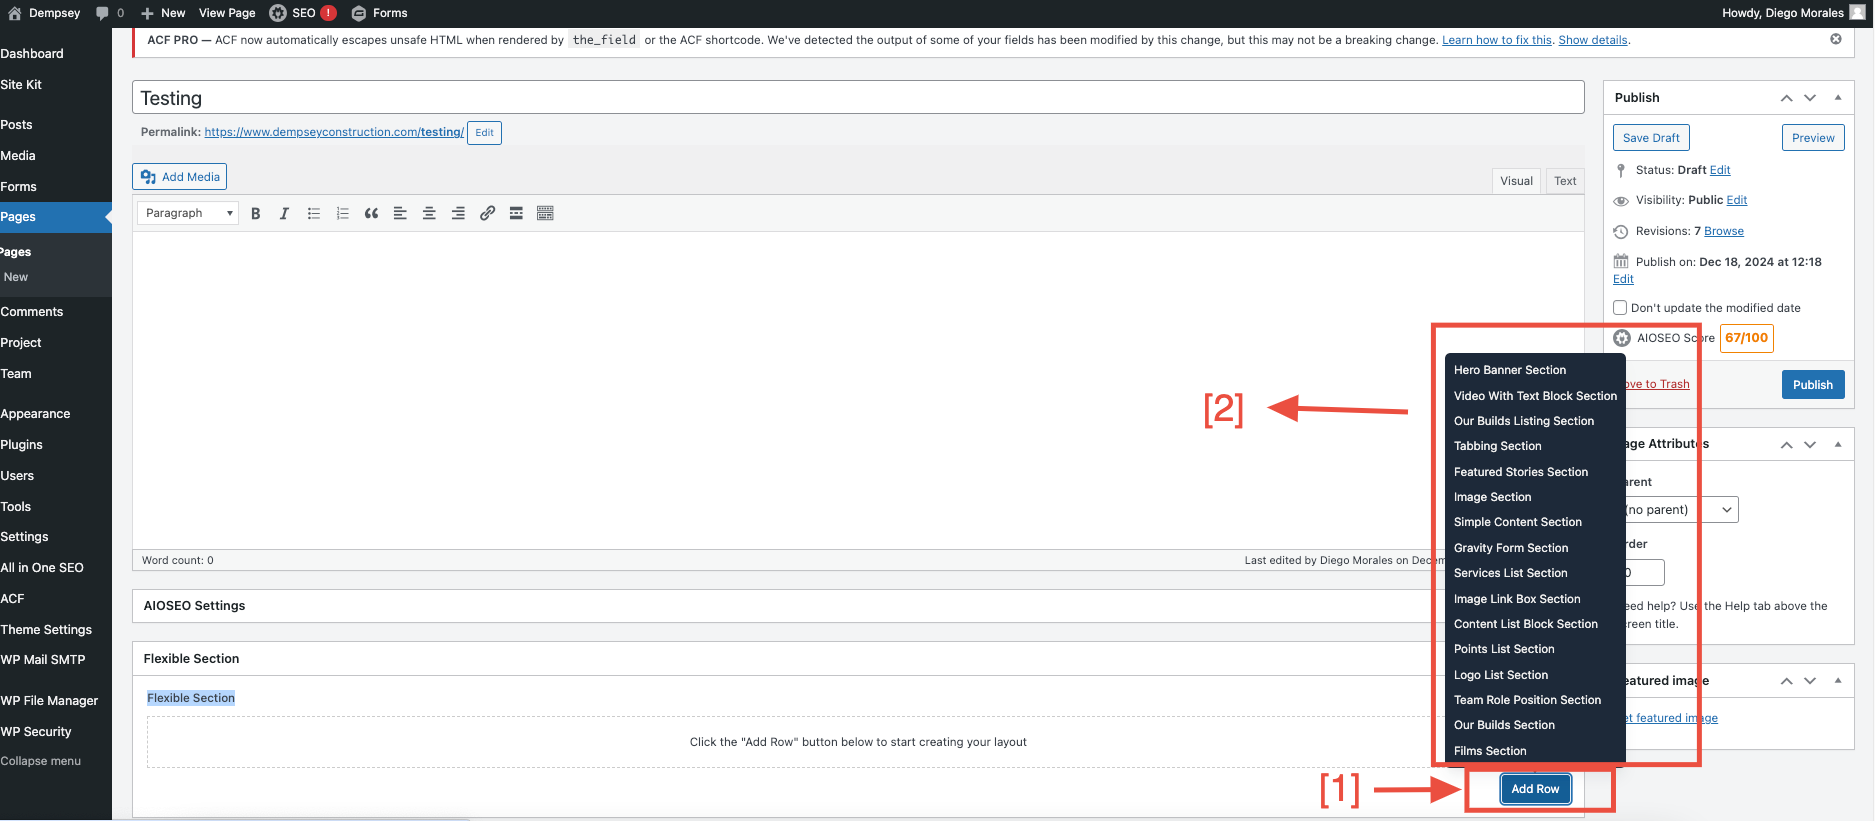
How to Add a Flexible Field
Steps
- Click the "Add Row" button to display all flexible fields.
- Choose your desired flexible field.
Flexible Section
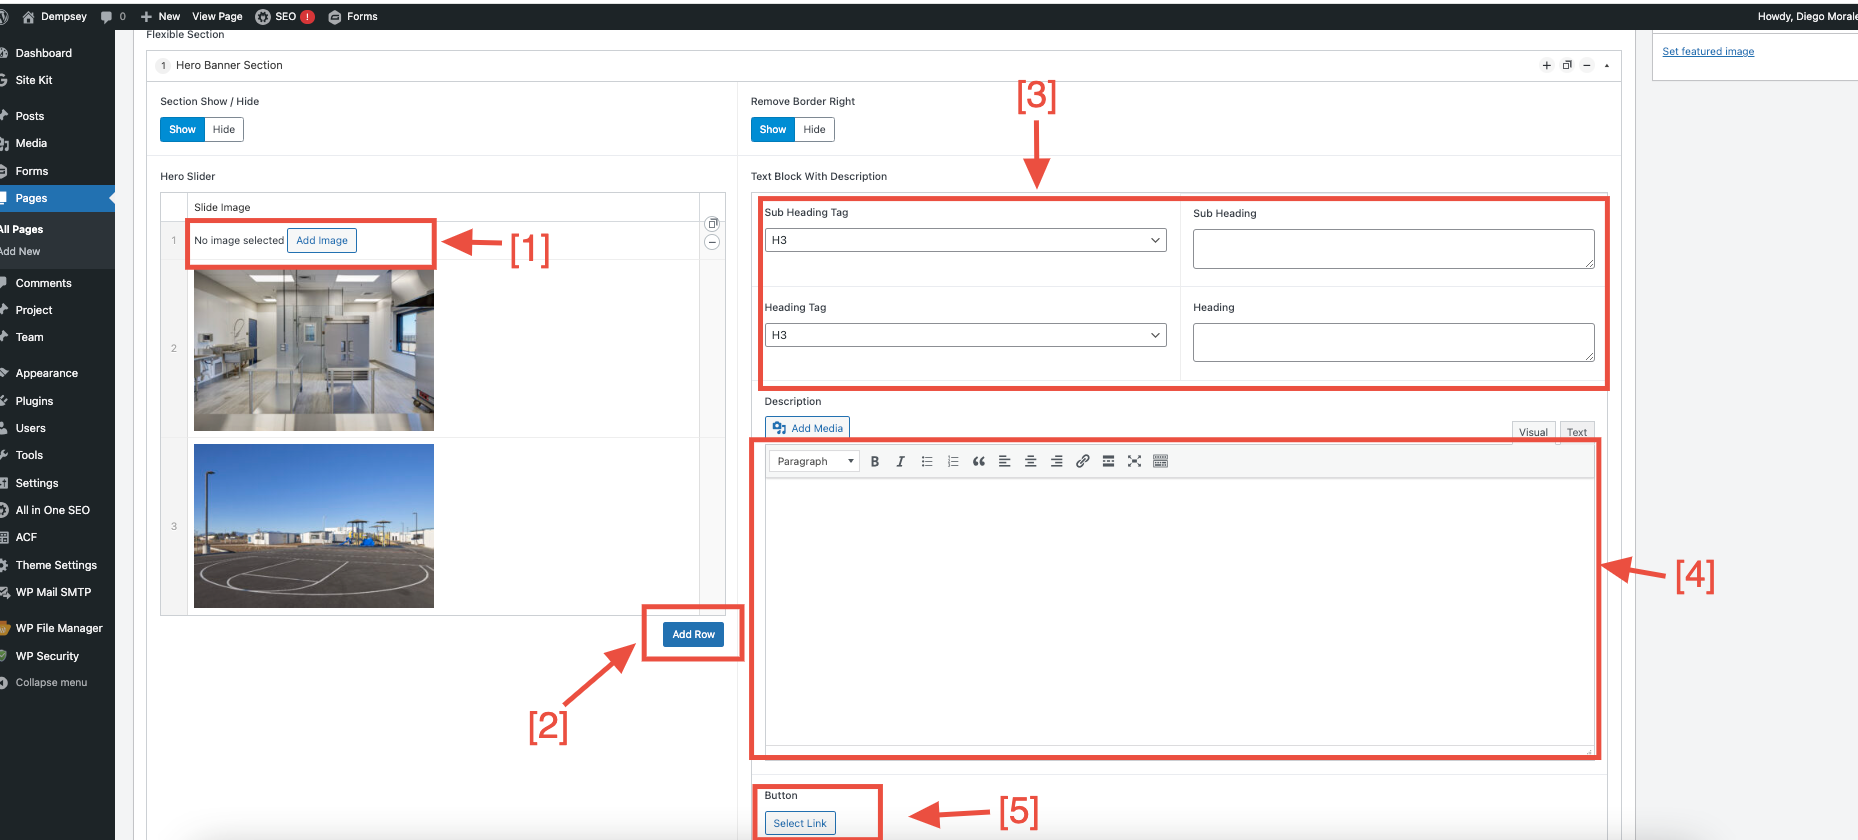
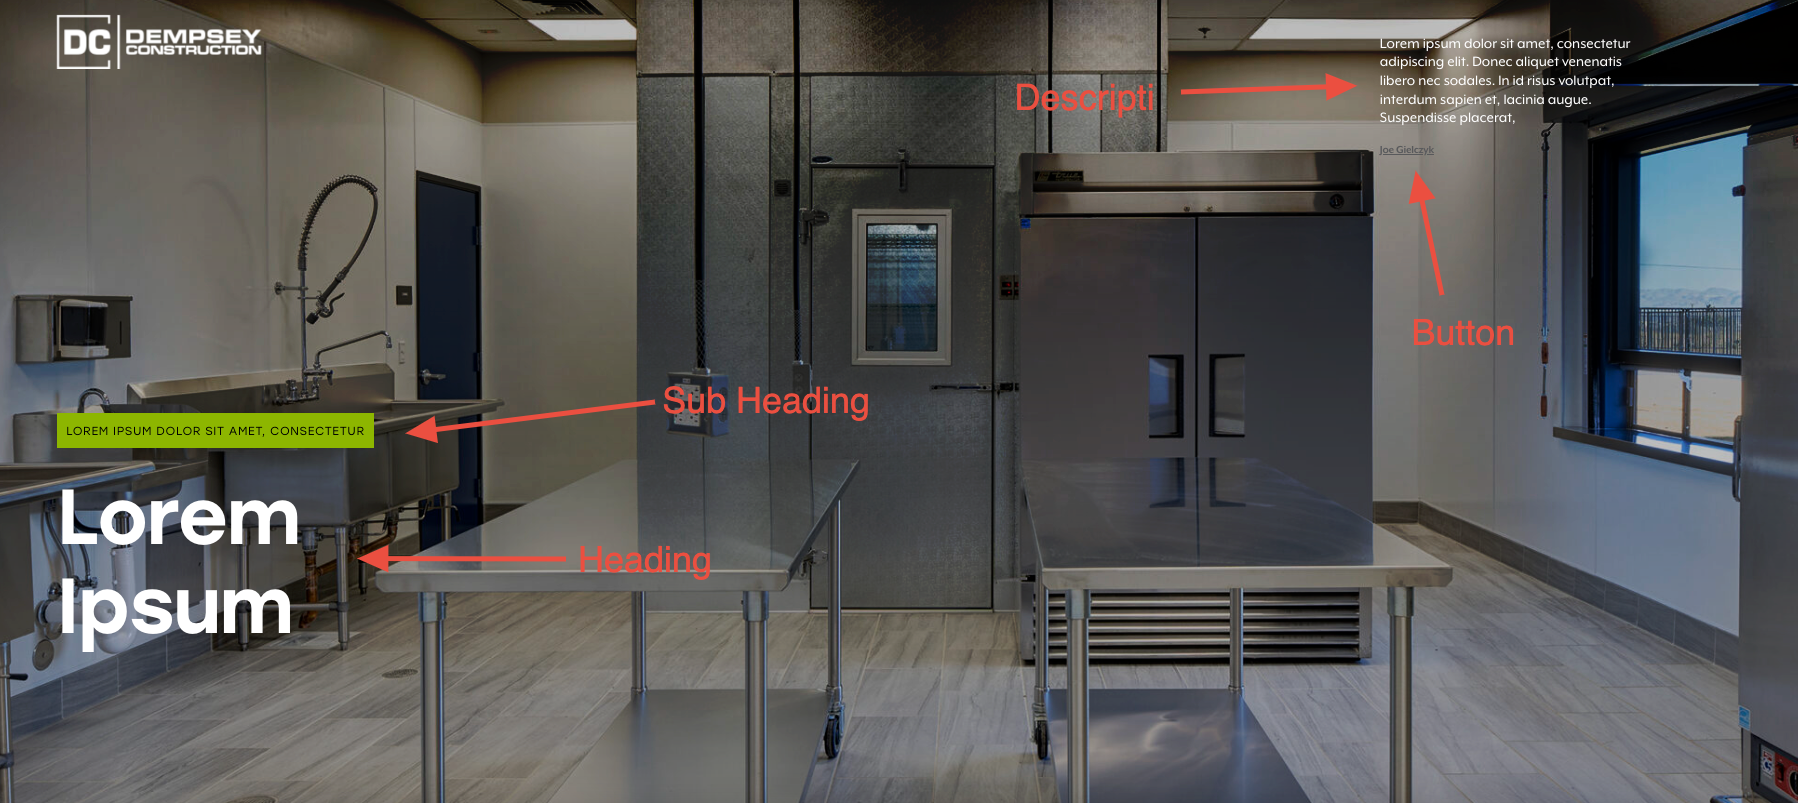
Home Banner Section
Steps
- Click on the "Add Image" button to add a slide image.
- Click on the "Add Row" button to add a new slide.
- Click on the "Textarea" to add a new heading and subheading. You can also use the dropdown to change the heading tag.
- Click on the "Textarea" to add a new description.
- Click on "Select Link" to add a button link.
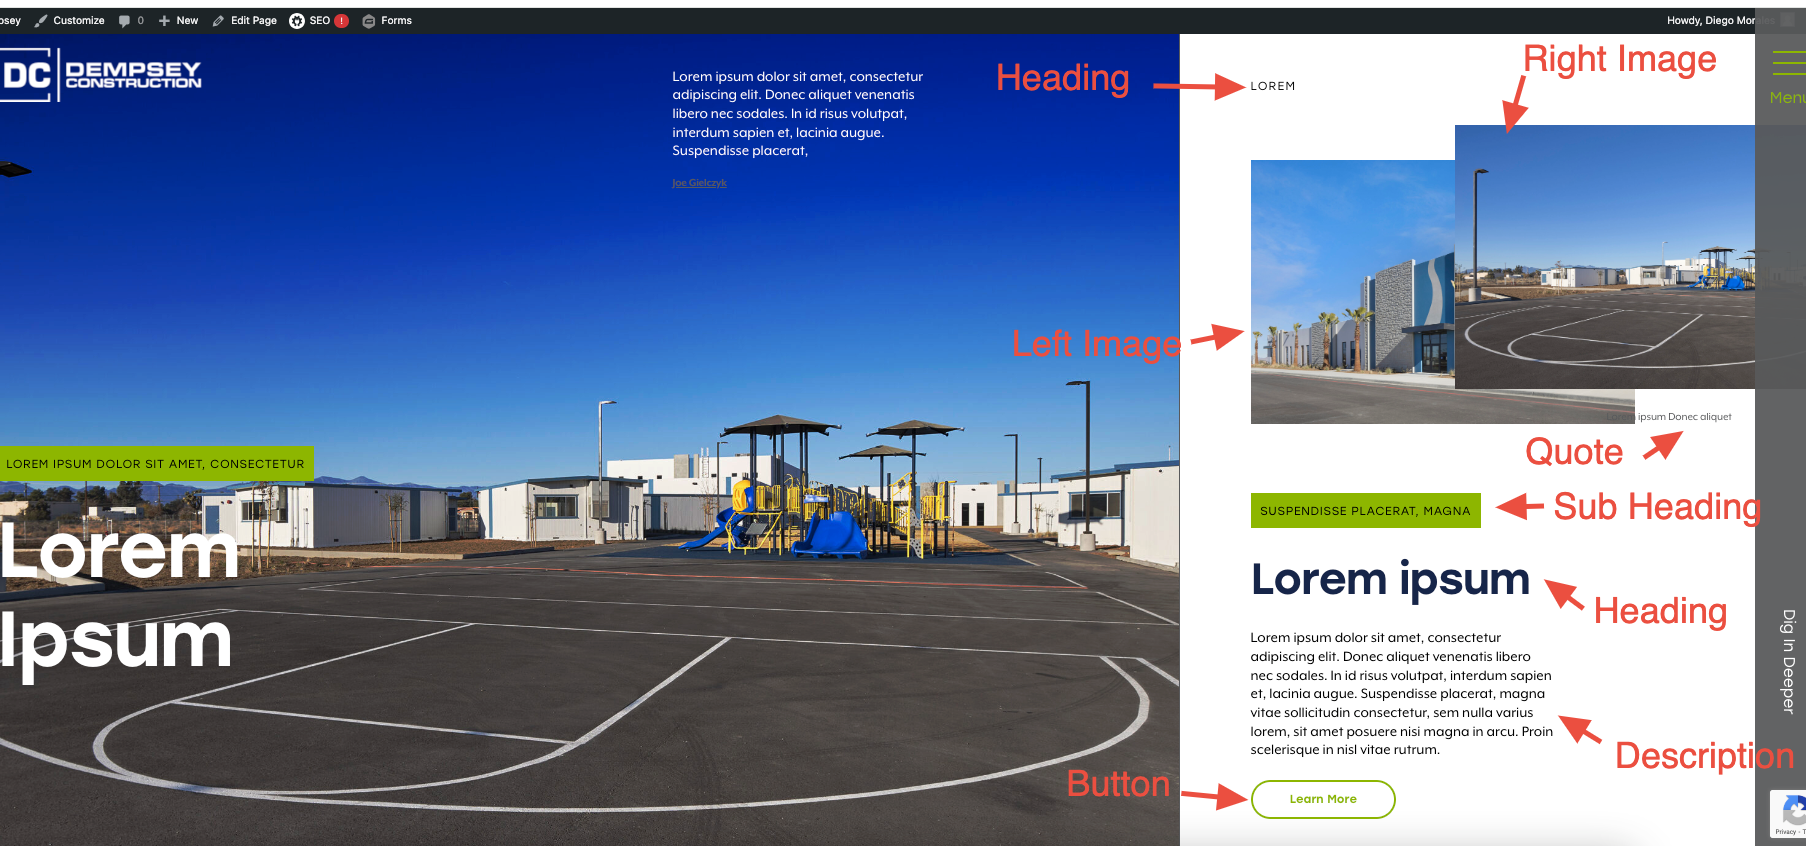
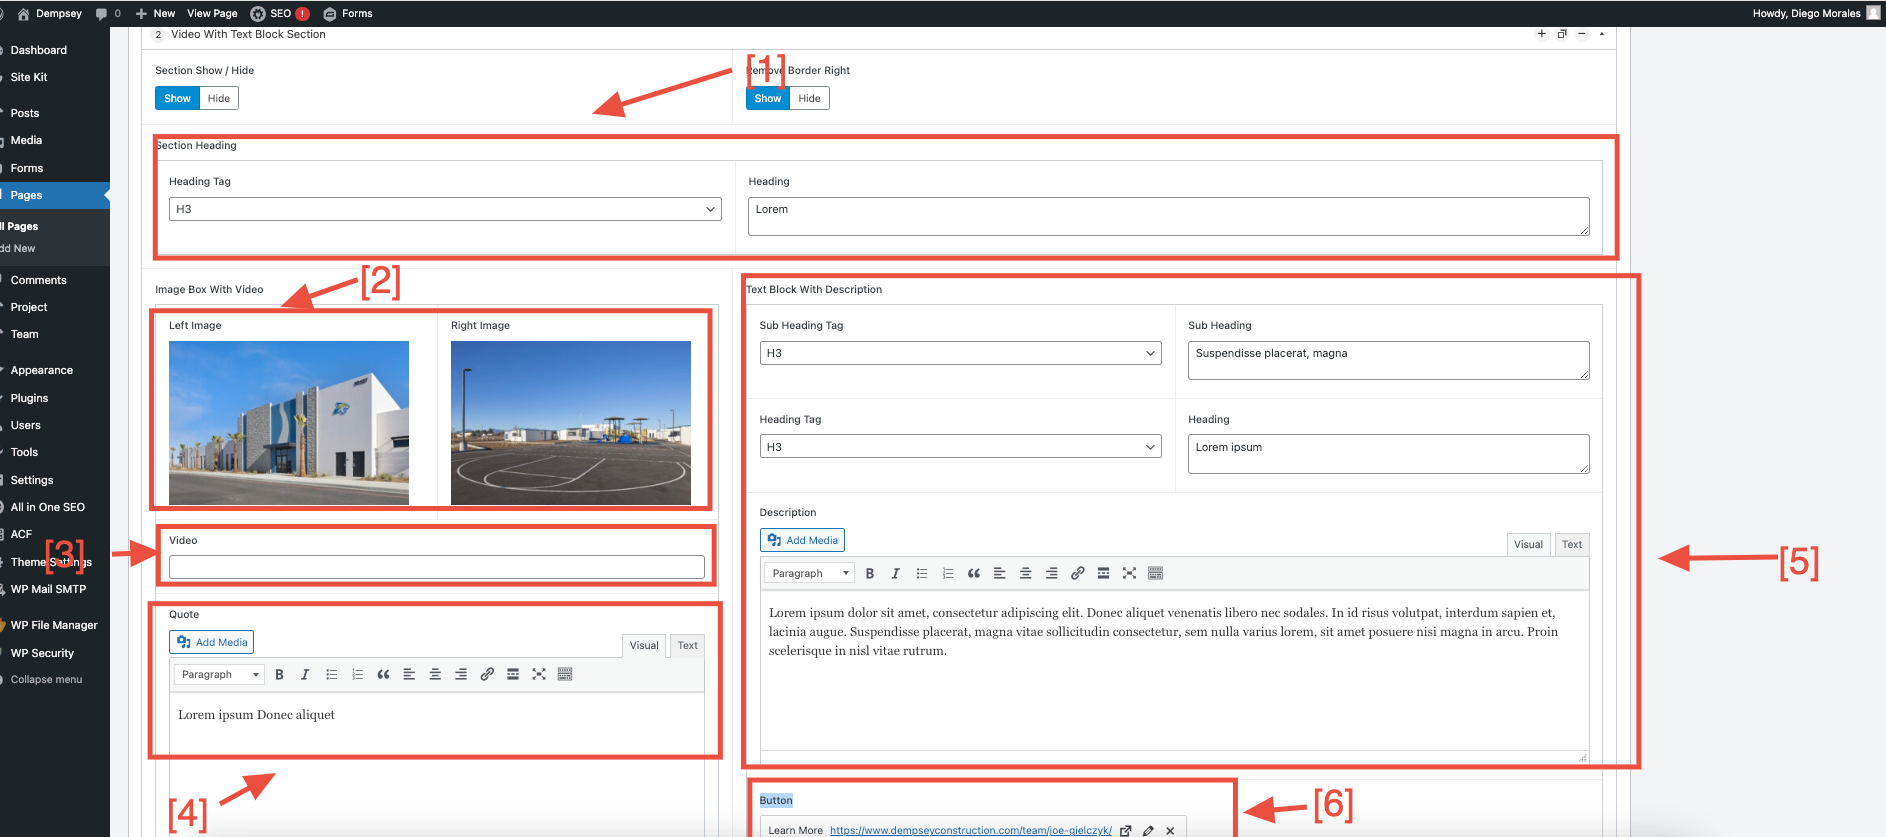
Video with Text Block Section
Steps
- Click on the "Textarea" to add a new heading and subheading.
- You can manage left and right images.
- Click on the "Textarea" to add a video.
- Click on the "Textarea" to add a quote.
- Click on the "Textarea" to add a new heading and subheading. You can also use the dropdown to change the heading tag.
- Click on "Select Link" to add a button link.
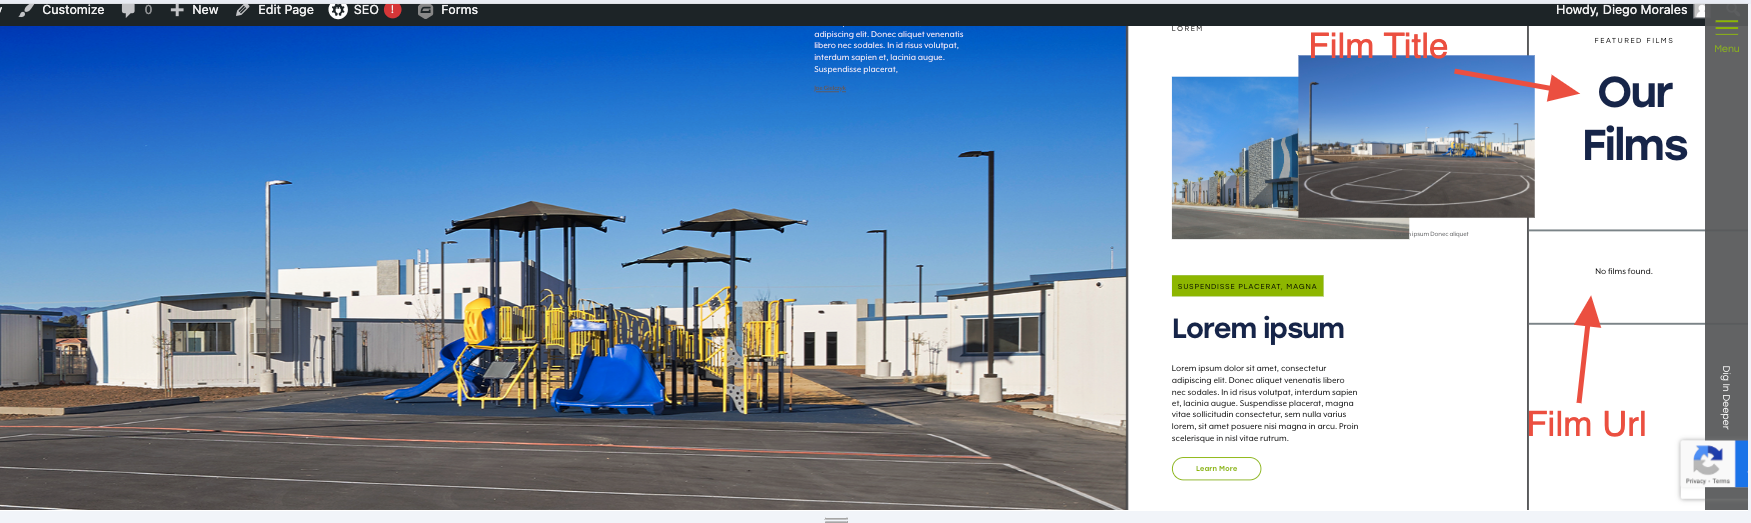
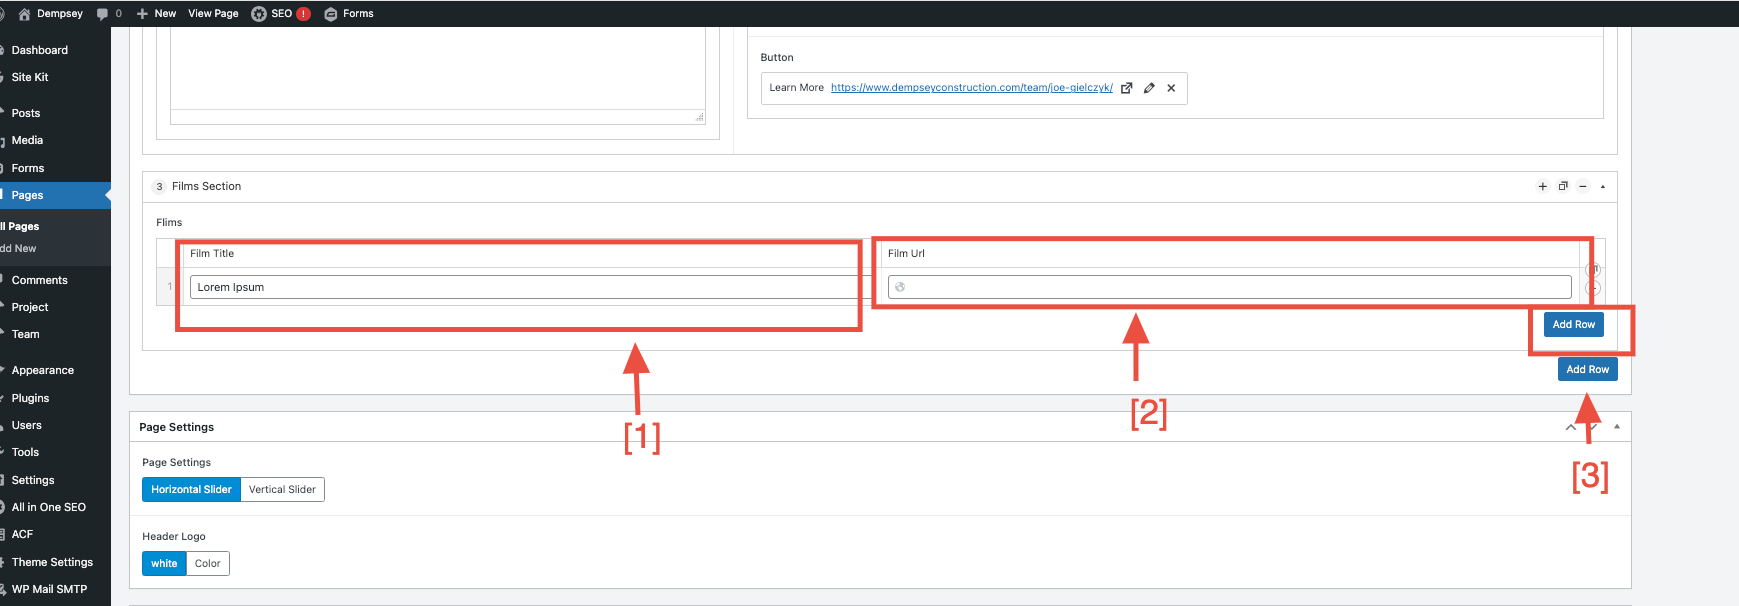
Films Section
Steps
- Click on the "Textarea" to add a film title.
- Click on the "URL" Textarea to add a film URL.
- Click on the "Add Row" button to add a new film.
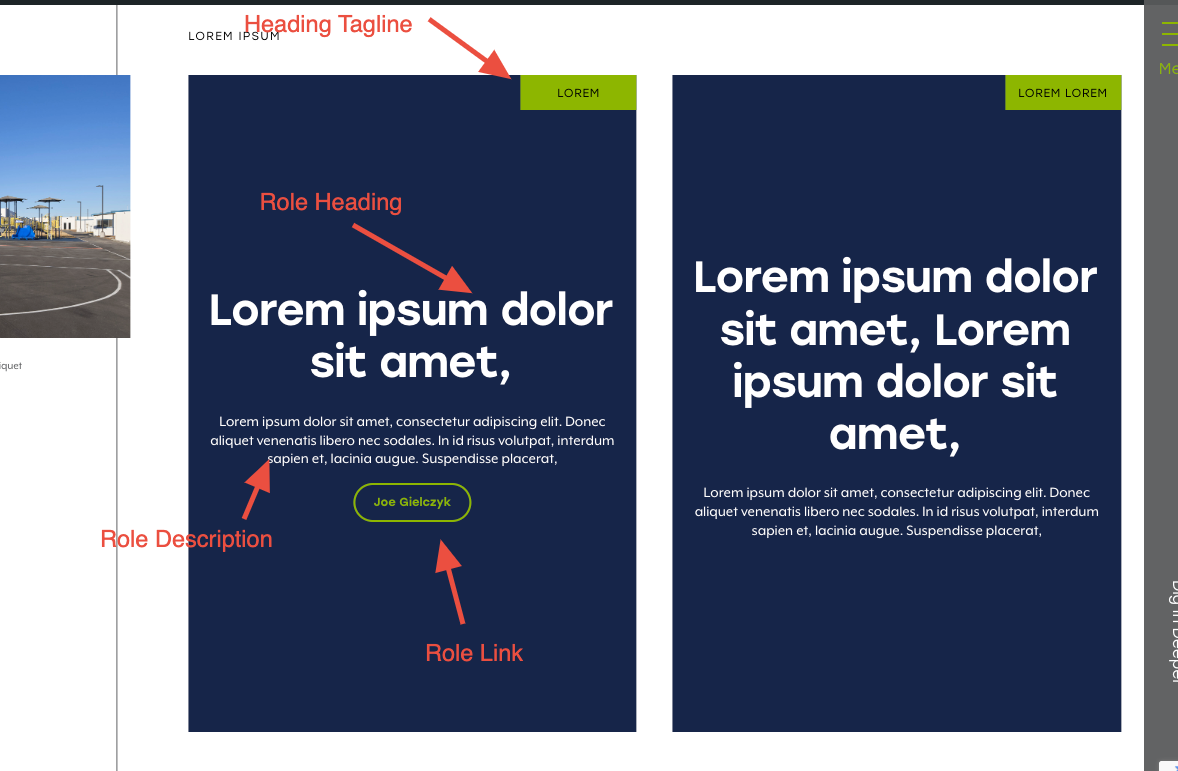
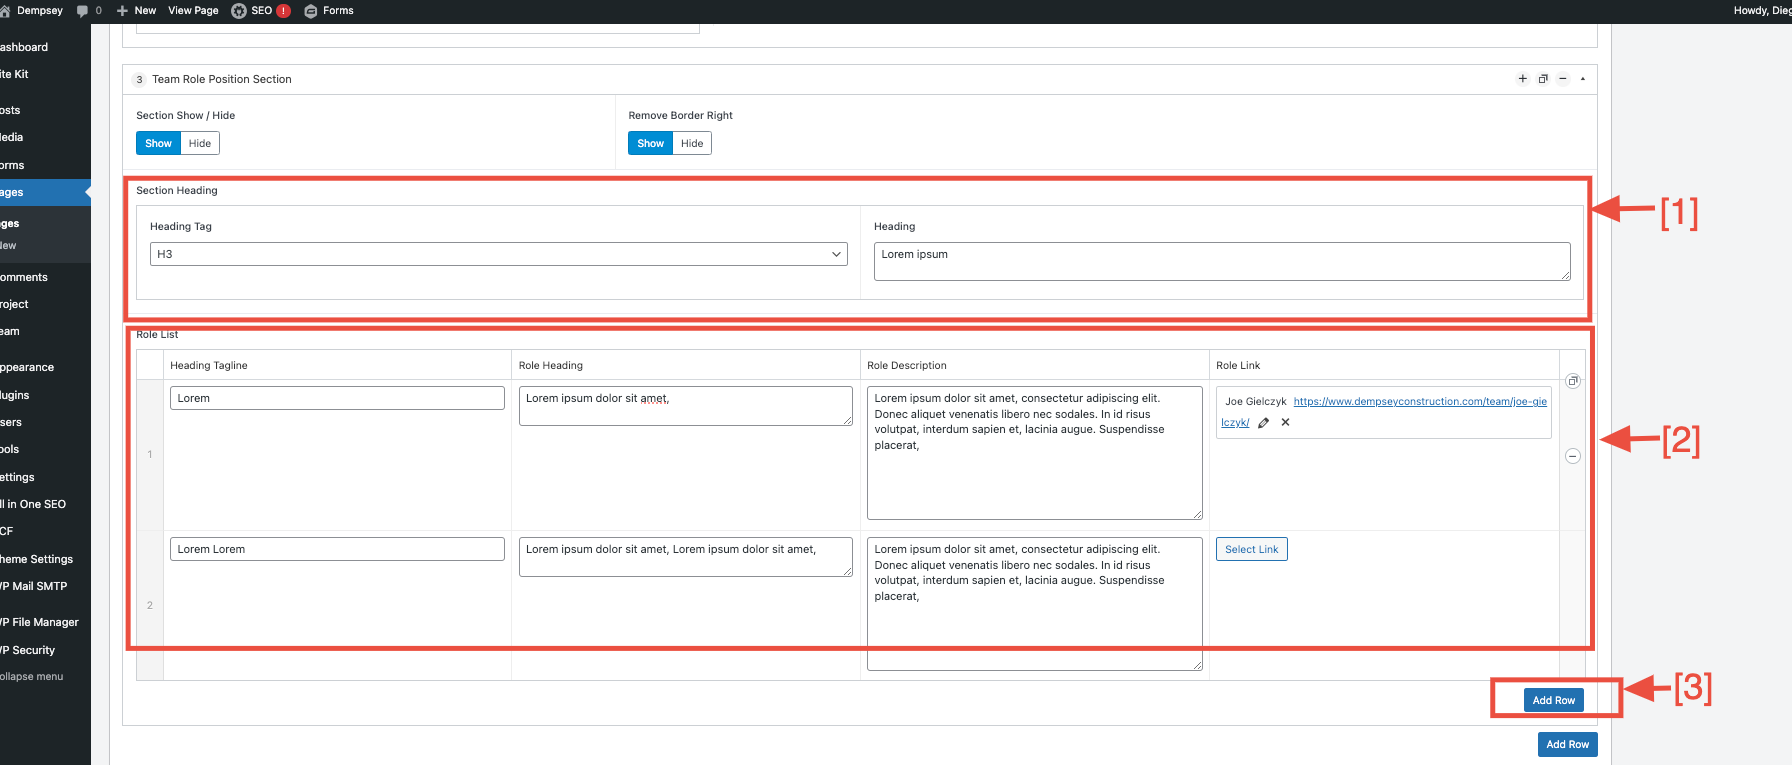
Team Role Position Section
Steps
- Click on the "Textarea" to add a new heading. You can also use the dropdown to change the heading tag.
- Click on the "Textarea" to add team role position information.
- Click on the "Add Row" button to add a new position.
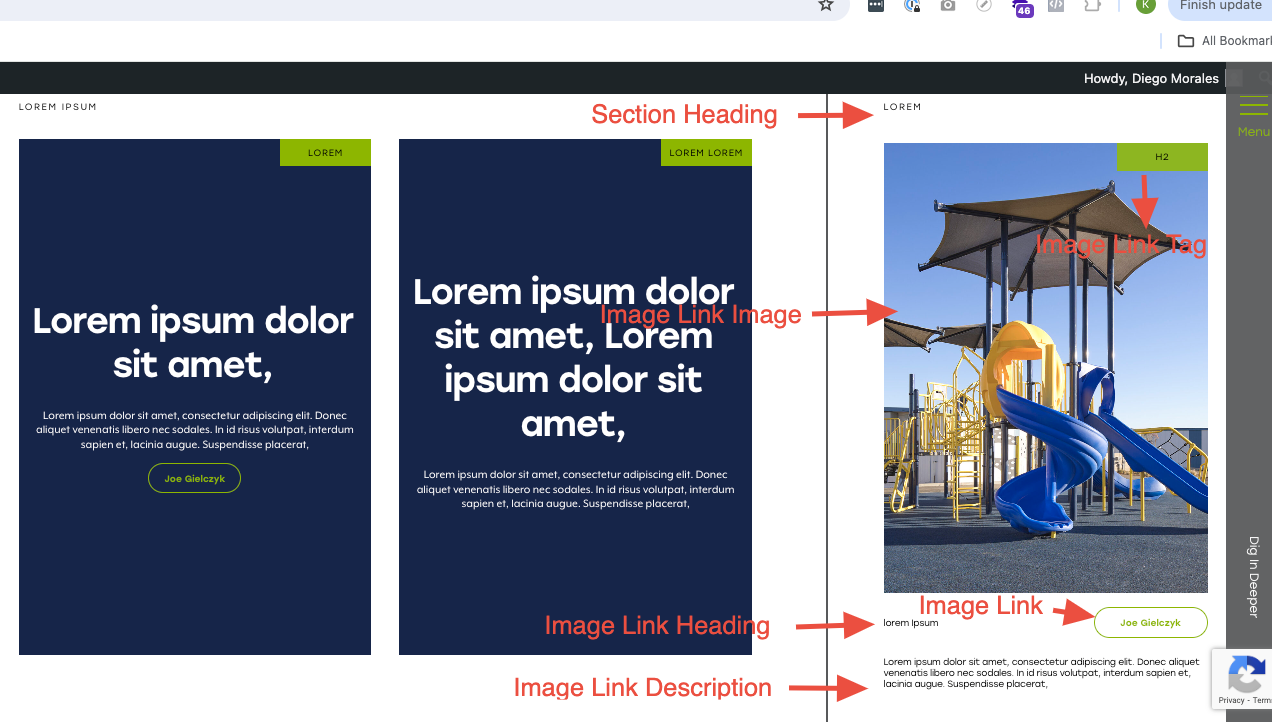
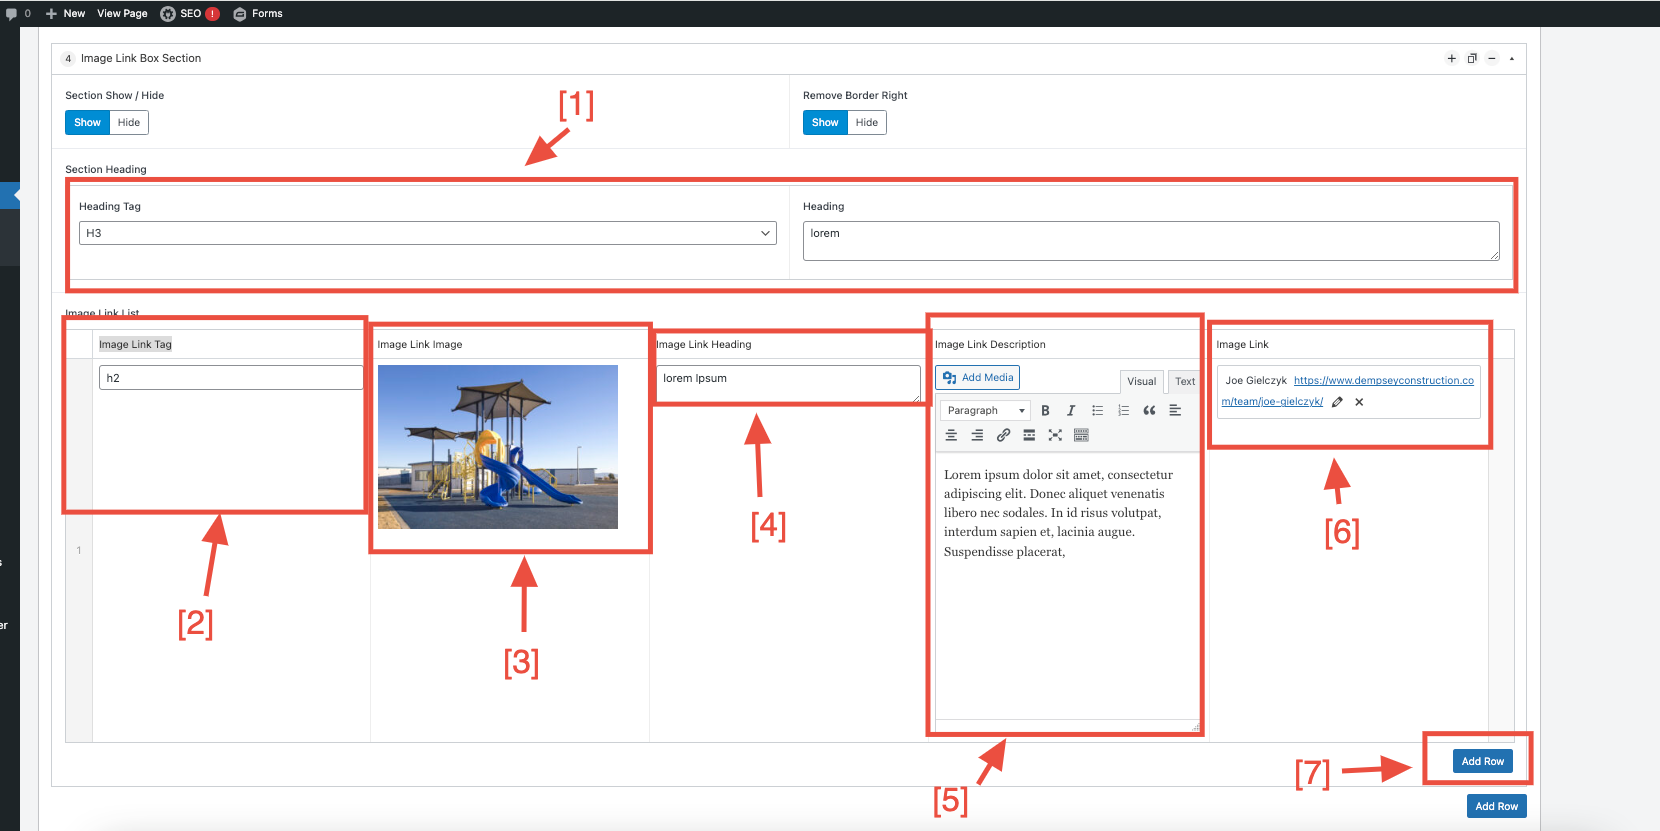
Image Link Box Section
Steps
- Click on the "Textarea" to add a new heading. You can also use the dropdown to change the heading tag.
- Click on the "Textarea" to add a new image tag.
- Click on the "image" to choose a new image.
- Click on the "Textarea" to add a new image heading.
- Click on the "Textarea" to add a new image description.
- Click on "Image Link" to add a link.
- Click on the "Add Row" button to add a new image box.
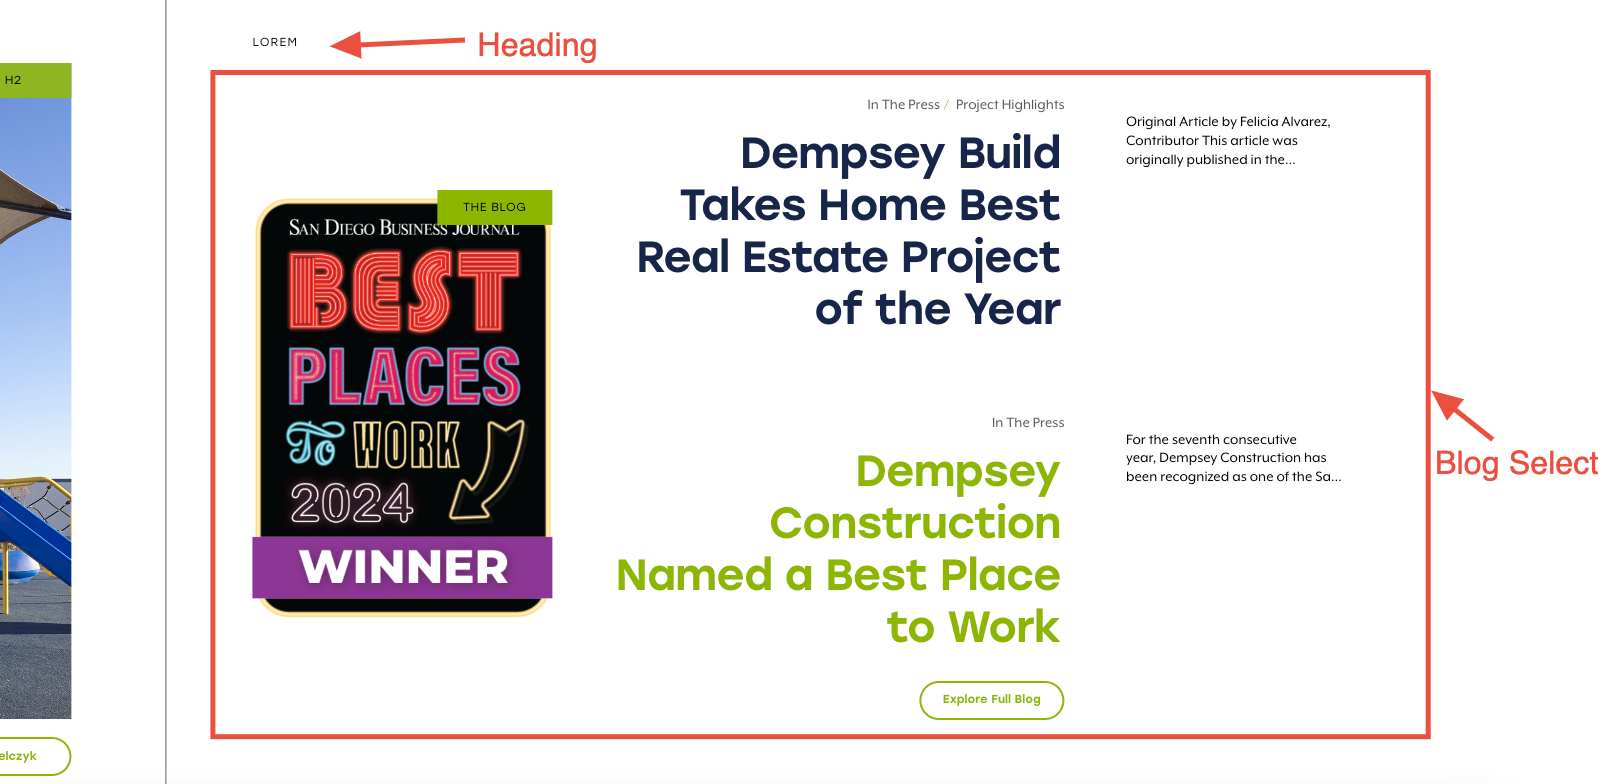
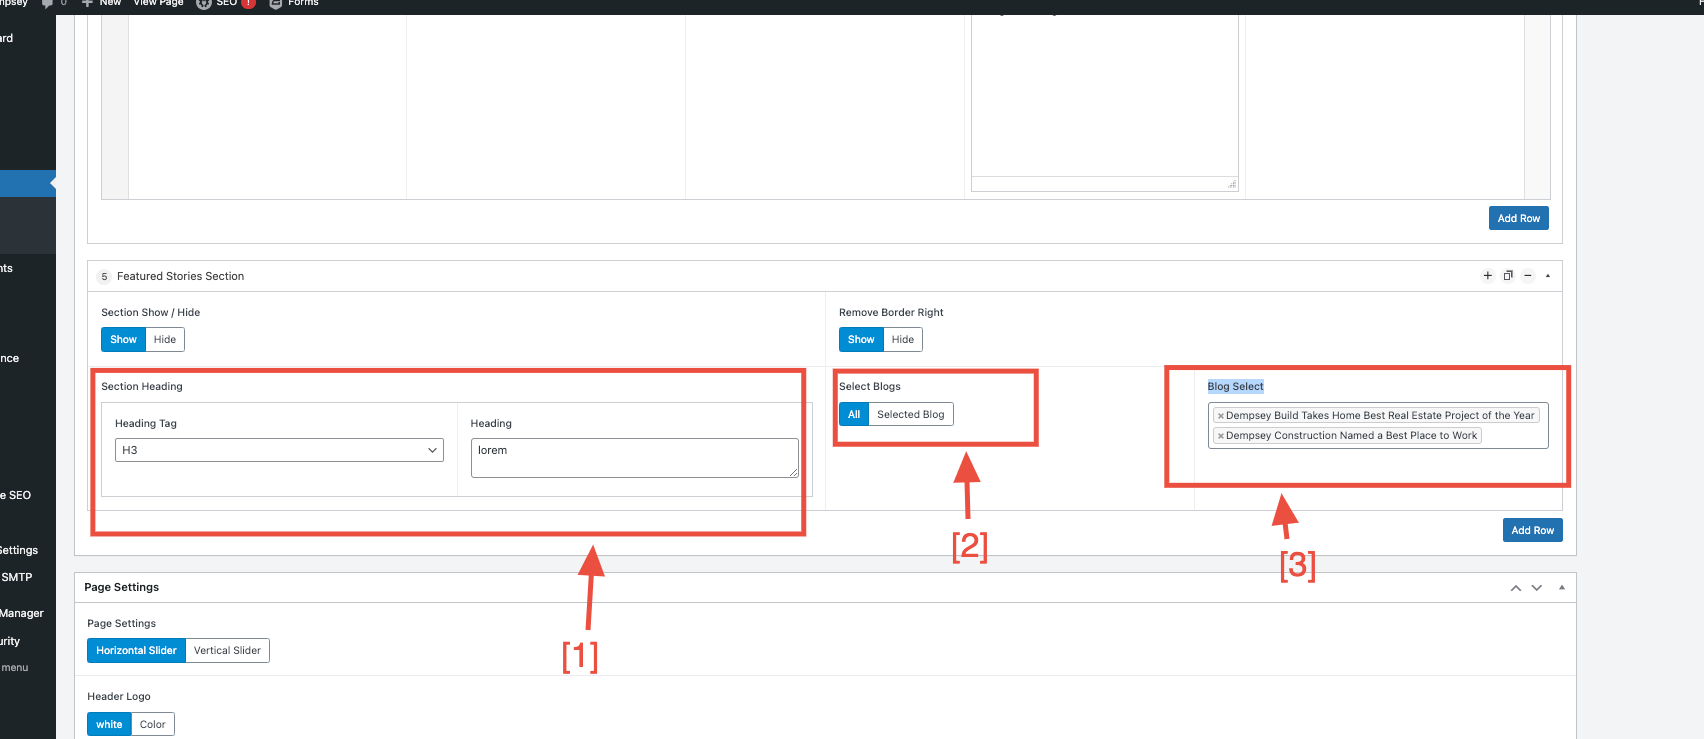
Featured Stories Section
Steps
- Click on the "Textarea" to add a new heading. You can also select the dropdown to change the heading tag.
- Click the button group option to show all blogs or selected blogs.
- You can choose specific blogs.
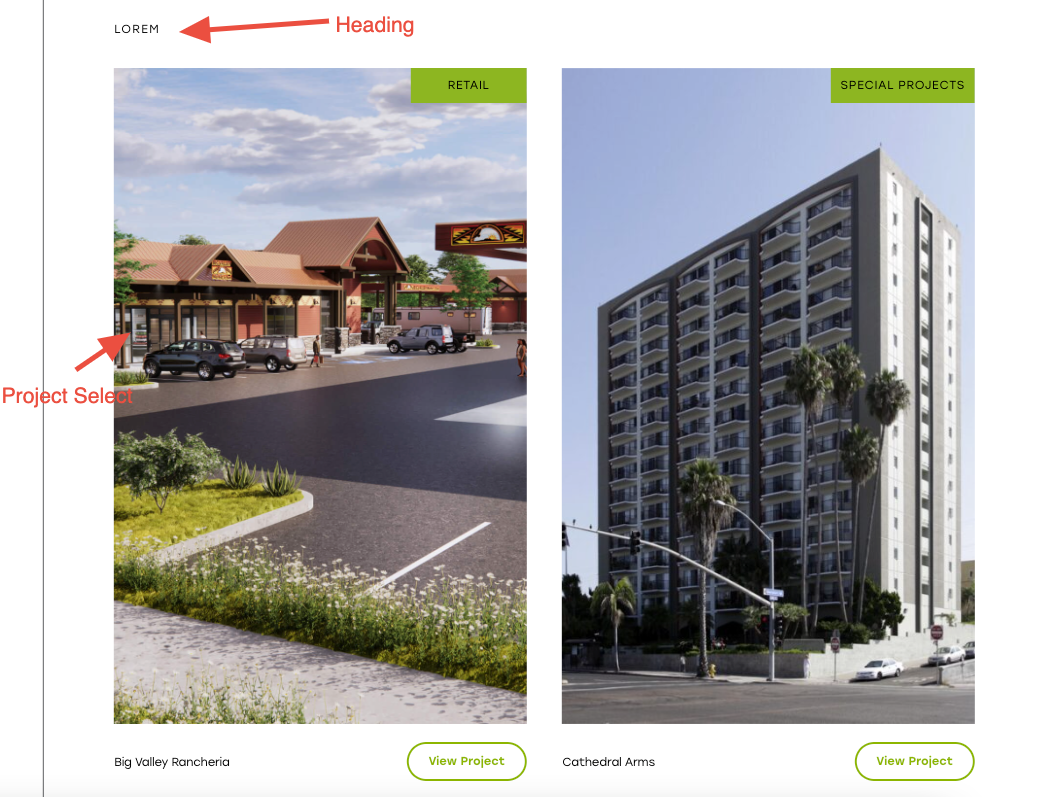
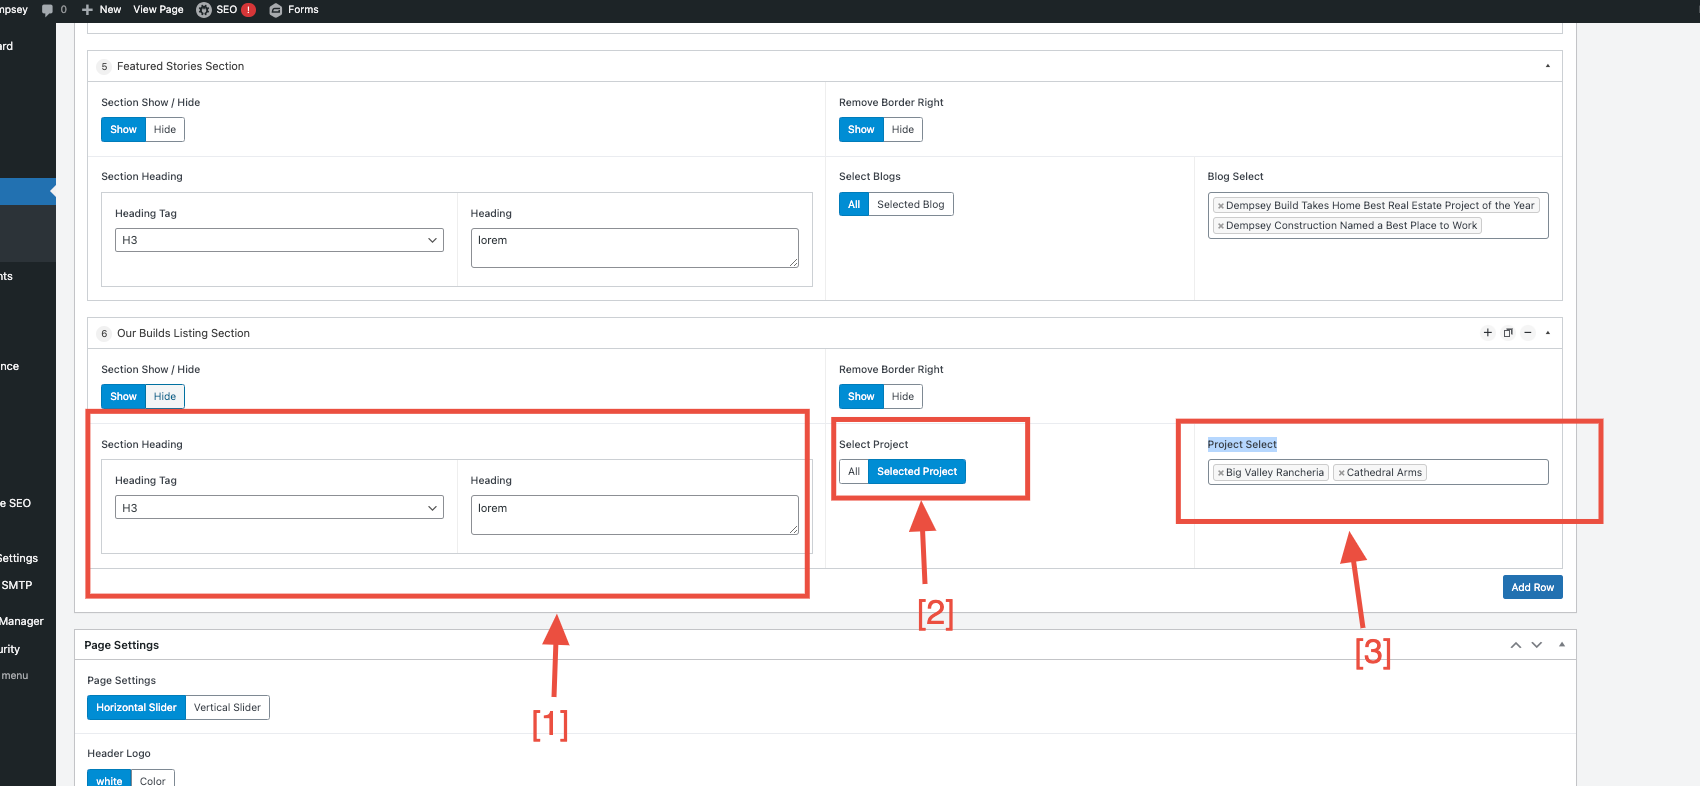
Our Builds Listing Section
Steps
- Click on the "Textarea" to add a new heading. You can also select the dropdown to change the heading tag.
- Click the button group option to show all projects or selected projects.
- You can choose specific projects.
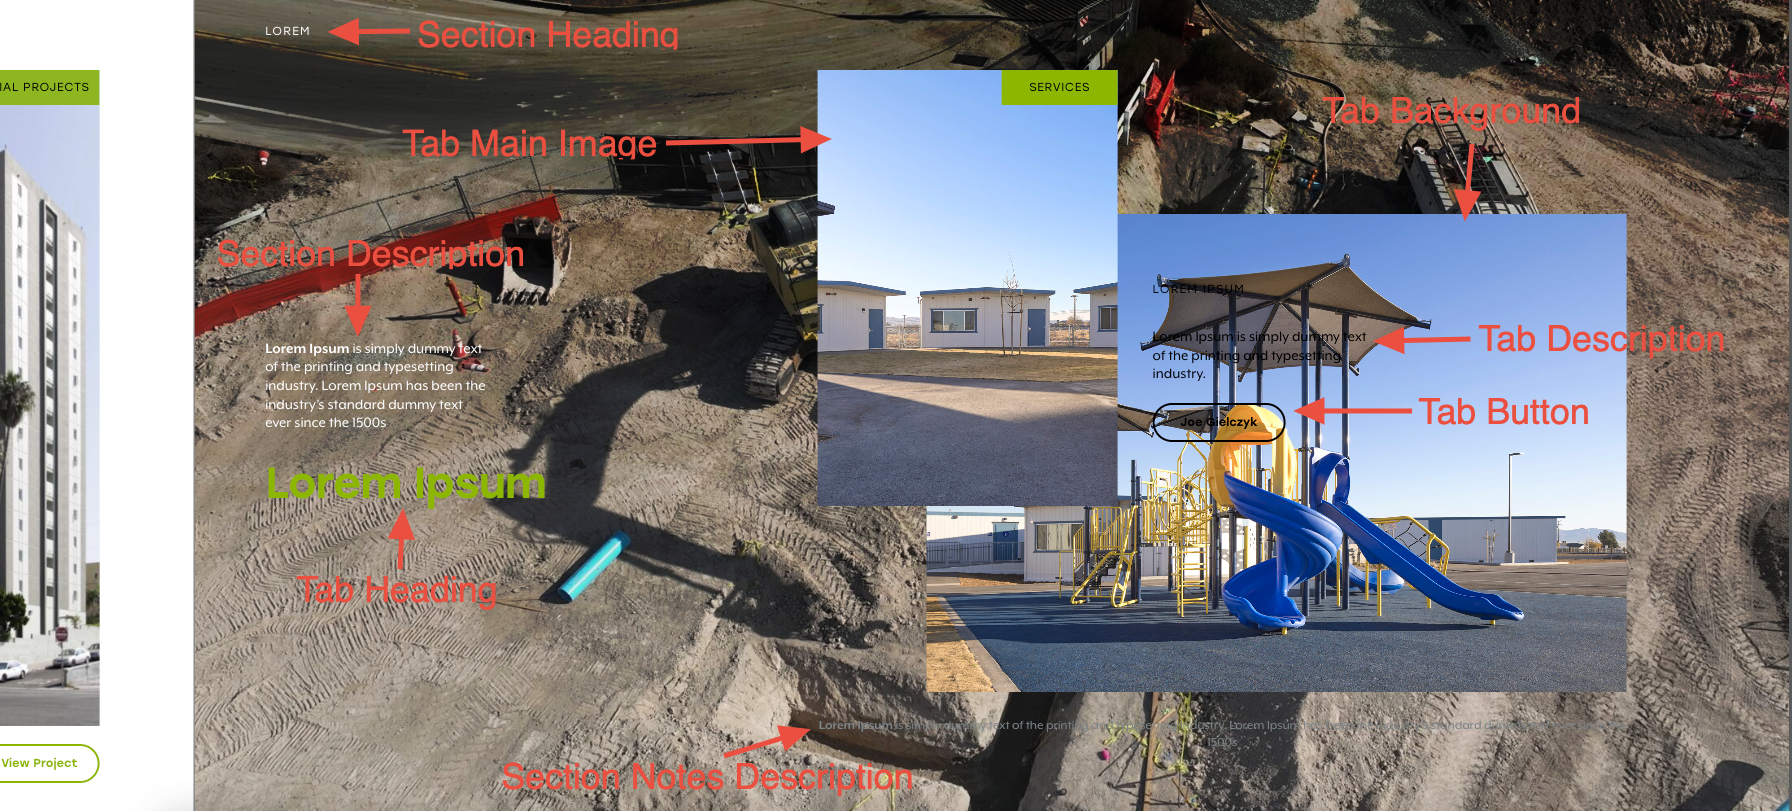
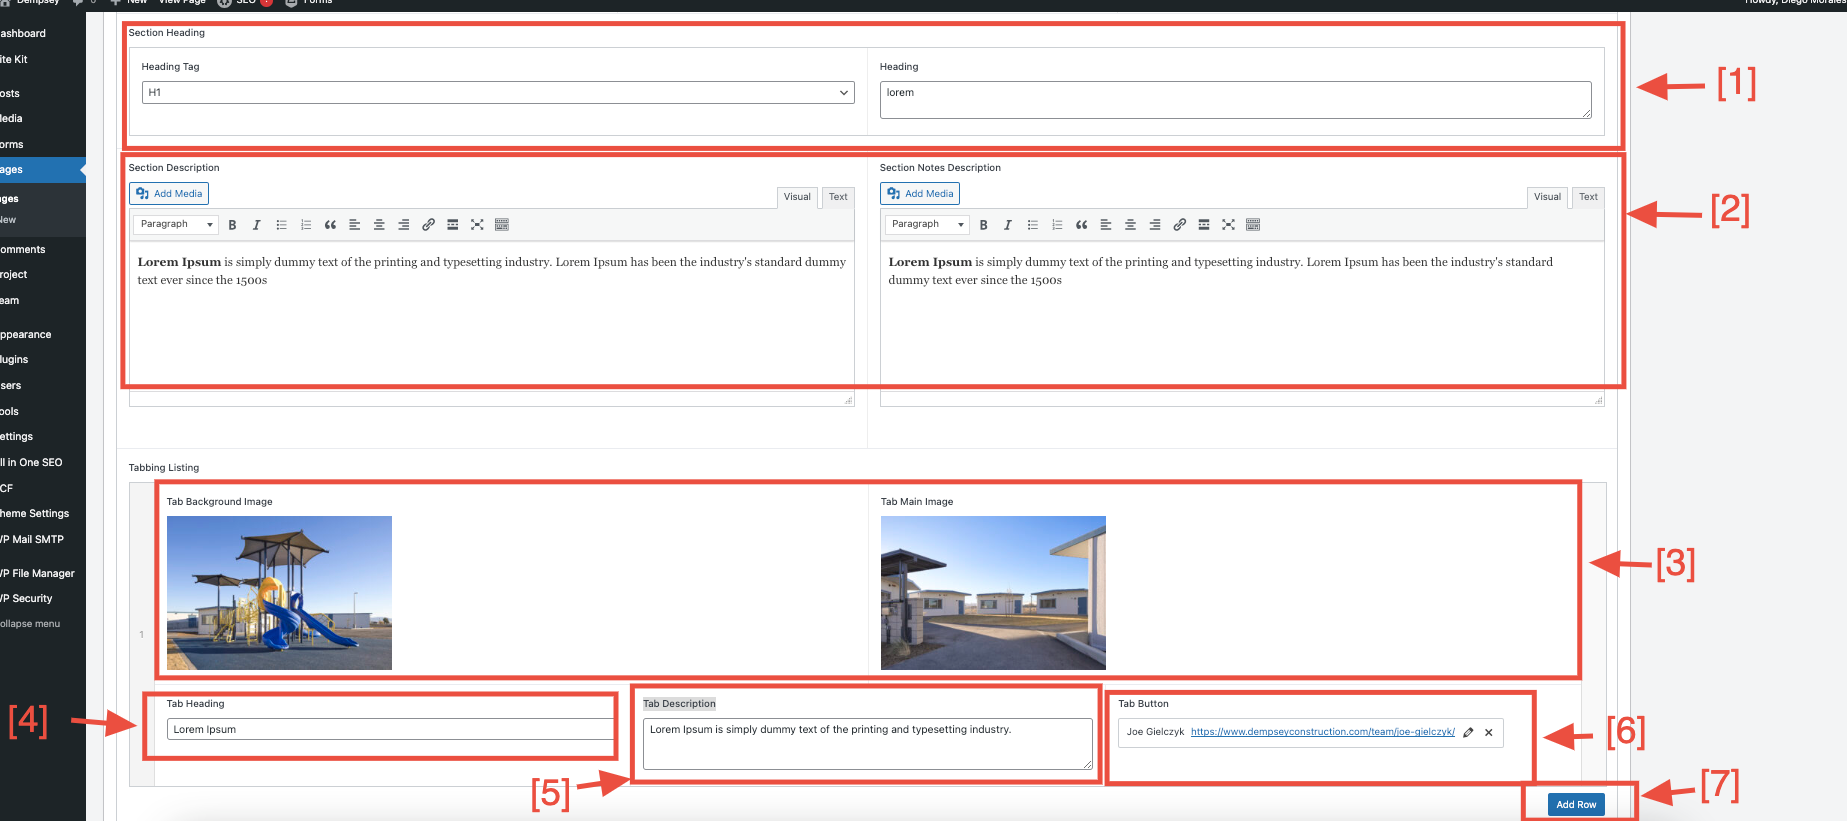
Tabbing Section
Steps
- Click on the "Textarea" to add a new heading. You can also select the dropdown to change the heading tag.
- Click on the "Textarea" to manage your section description and notes description.
- You can change your tab images.
- Click on the "Textarea" to add a new tab heading.
- Click on the "Textarea" to add a new tab description.
- Click on the "tab button" to add a tab link.
- Click on "Add Row" to add a new tab.
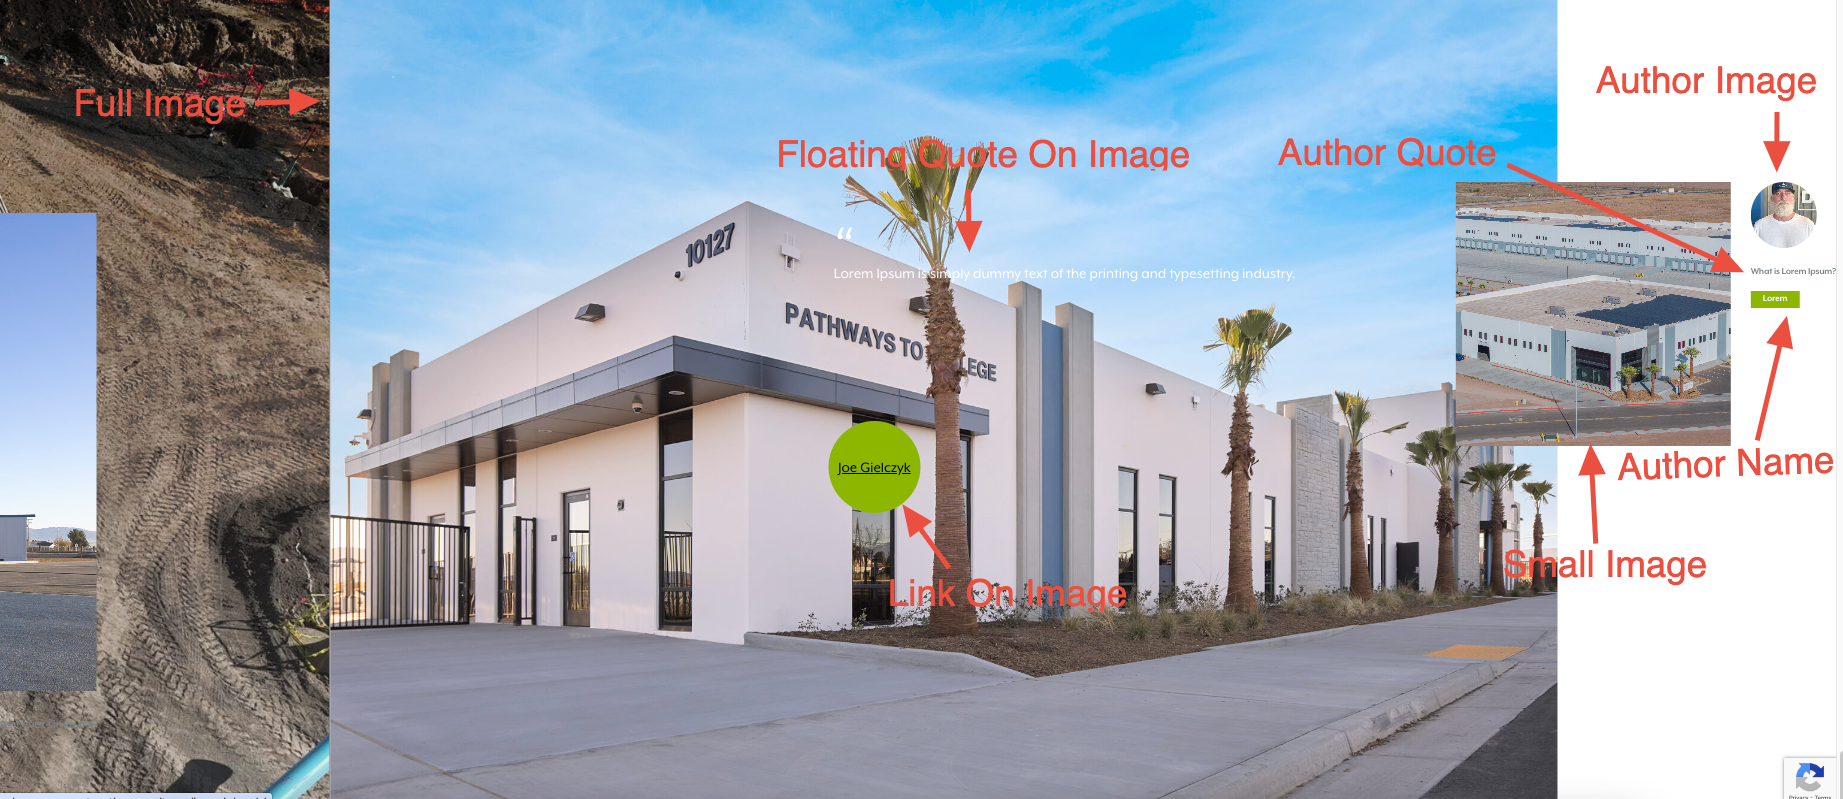
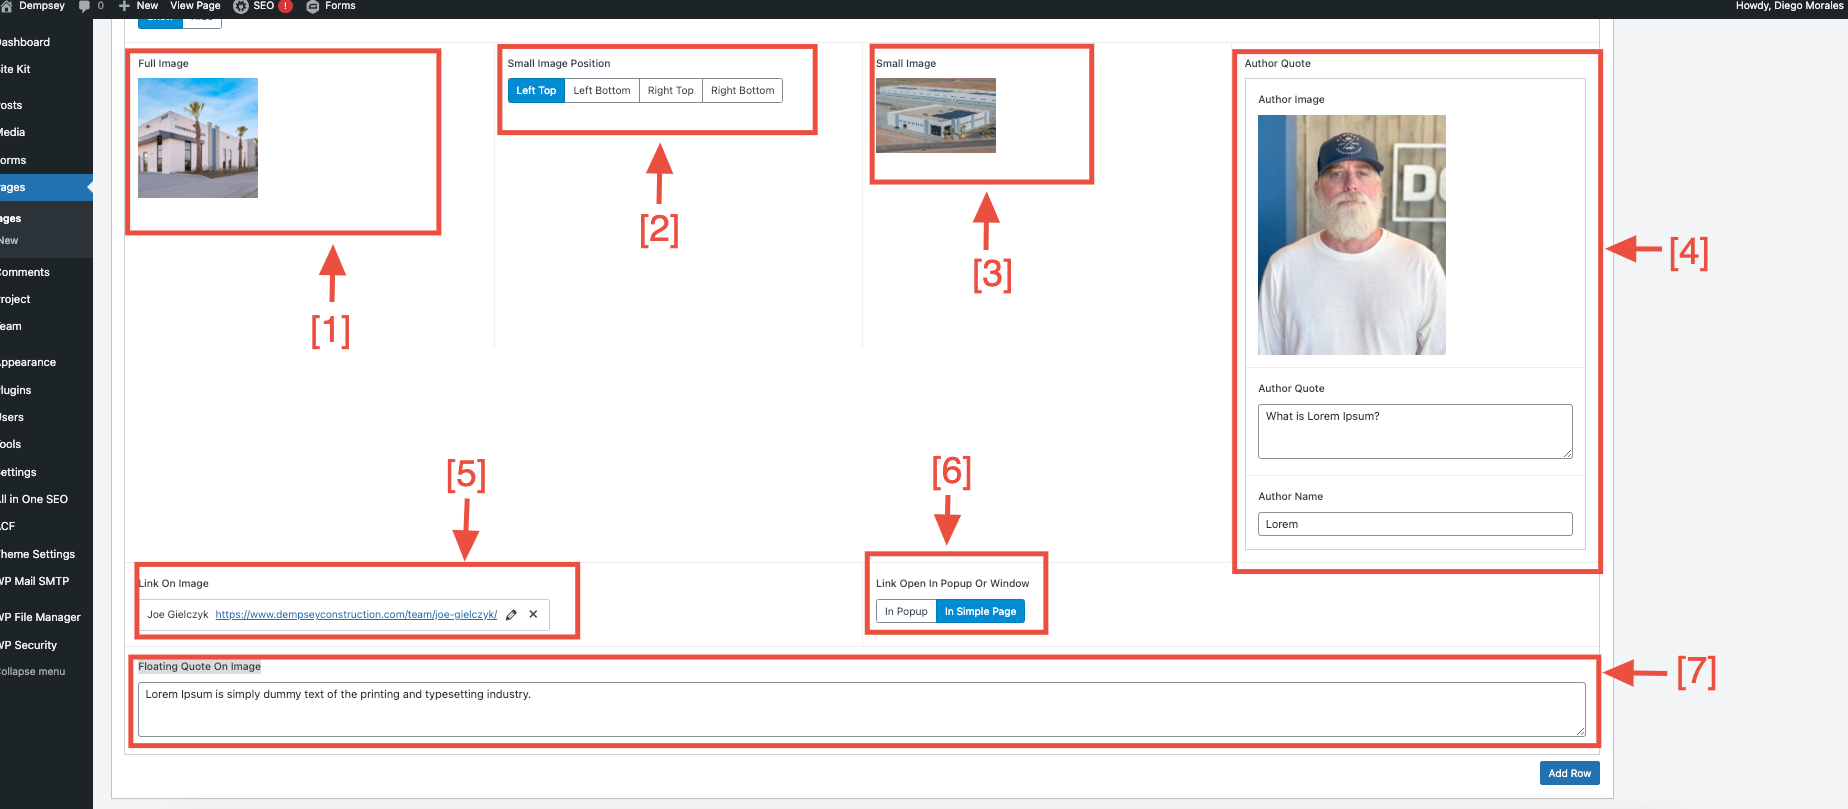
Image Section
Steps
- You can change your background images.
- You can choose the button group option to manage your small image position.
- You can change your small images.
- You can edit your author details.
- You can manage your image links.
- You can choose the button group option to decide how to display your link data—either as a popup or on a simple page.
- Click on the "Textarea" to change your floating quote.
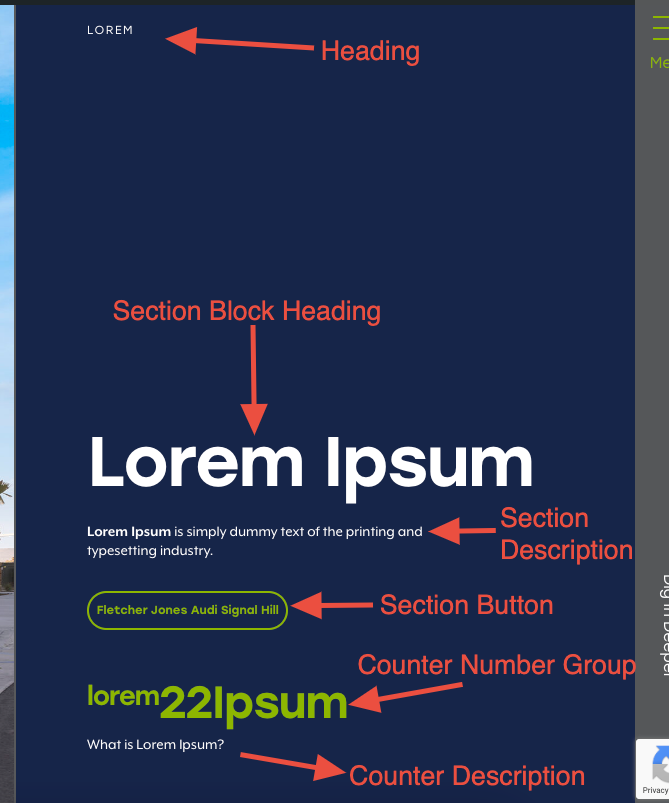
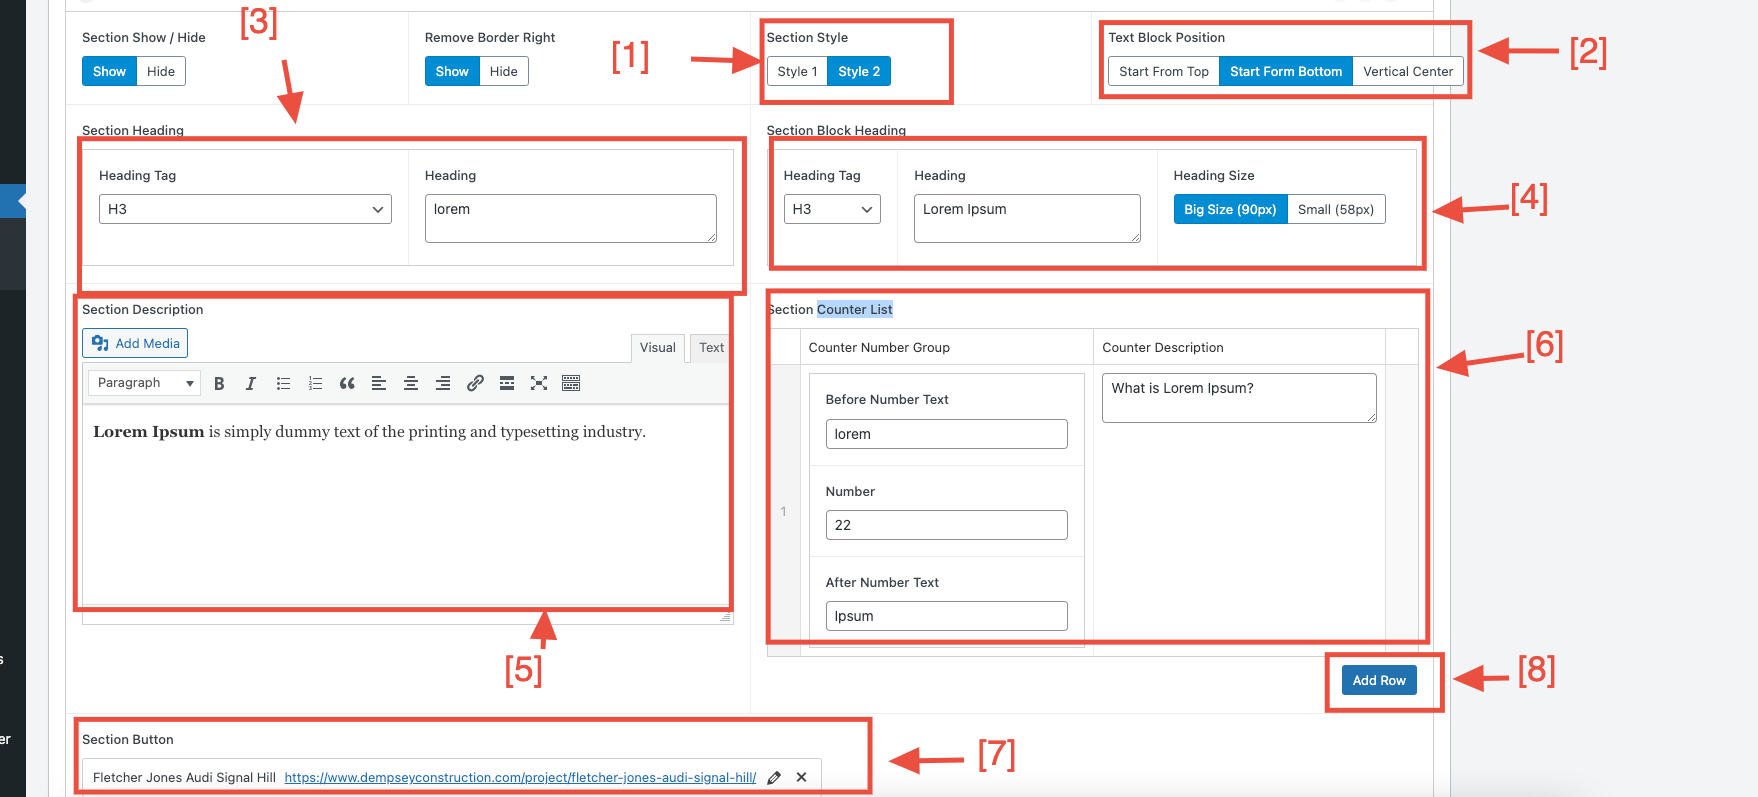
Simple Content Section
Steps
- You can choose the button group option to manage your section background color.
- You can choose the button group option to manage your text block position.
- Click on the "Textarea" to add a new heading. You can also select the dropdown to change the heading tag.
- Click on the "heading" Textarea to add a new heading. You can also select the dropdown to change the heading tag and adjust the font size.
- Click on the "Textarea" to change your section description.
- You can manage your counter list data.
- You can add your section button link.
- Click on "Add Row" to add a counter list.
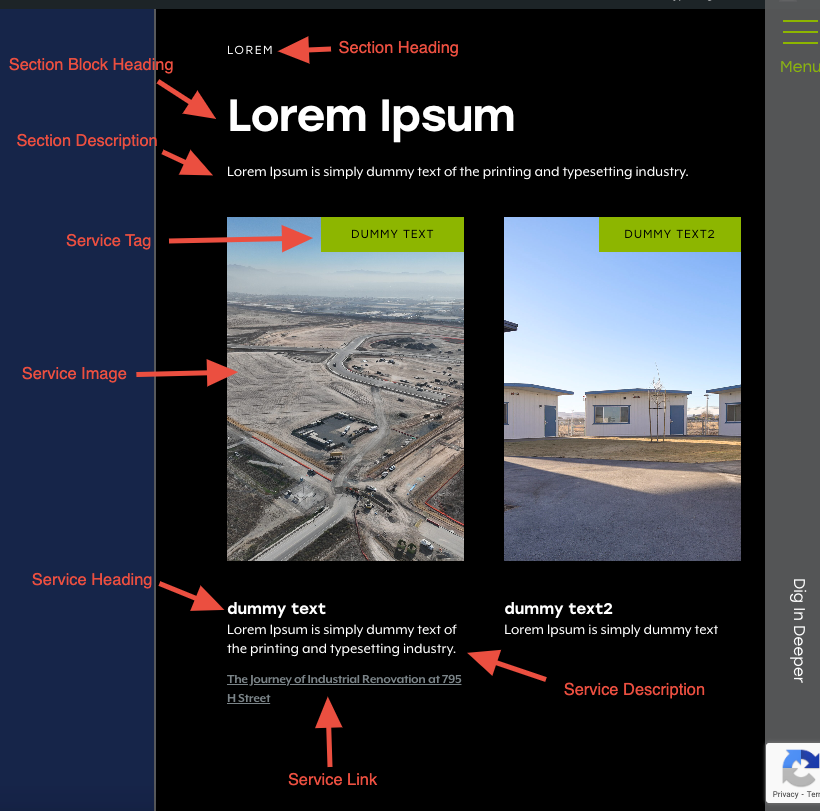
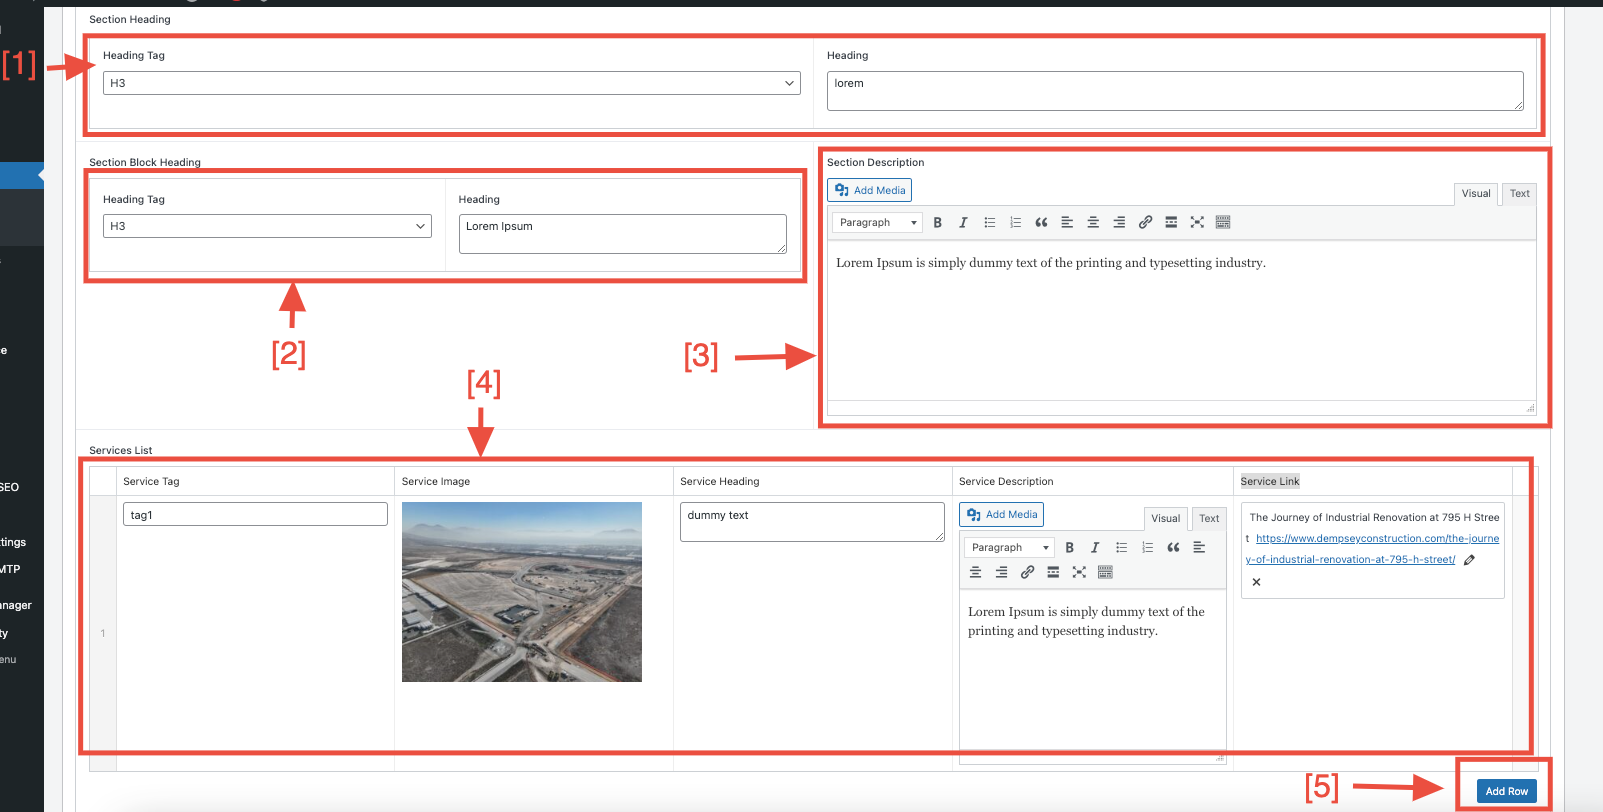
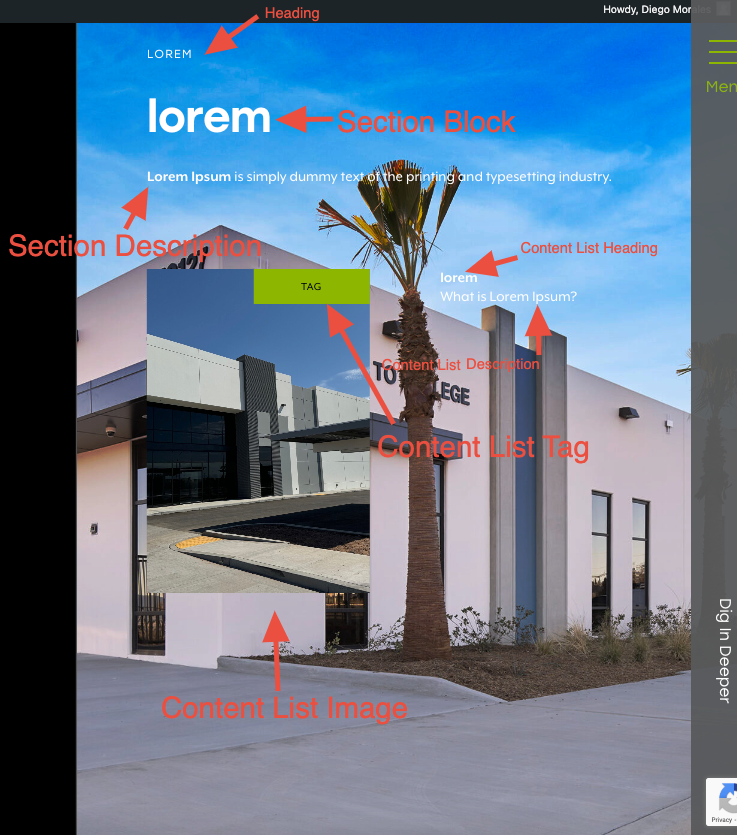
Services List Section
Steps
- Click on the "Textarea" to add a new heading. You can also select the dropdown to change the heading tag.
- Click on the "Textarea" to add a new section block heading. You can also select the dropdown to change the heading tag.
- Click on the "Textarea" to add a new section description.
- You can manage your services list data.
- Click on "Add Row" to add a new services list.
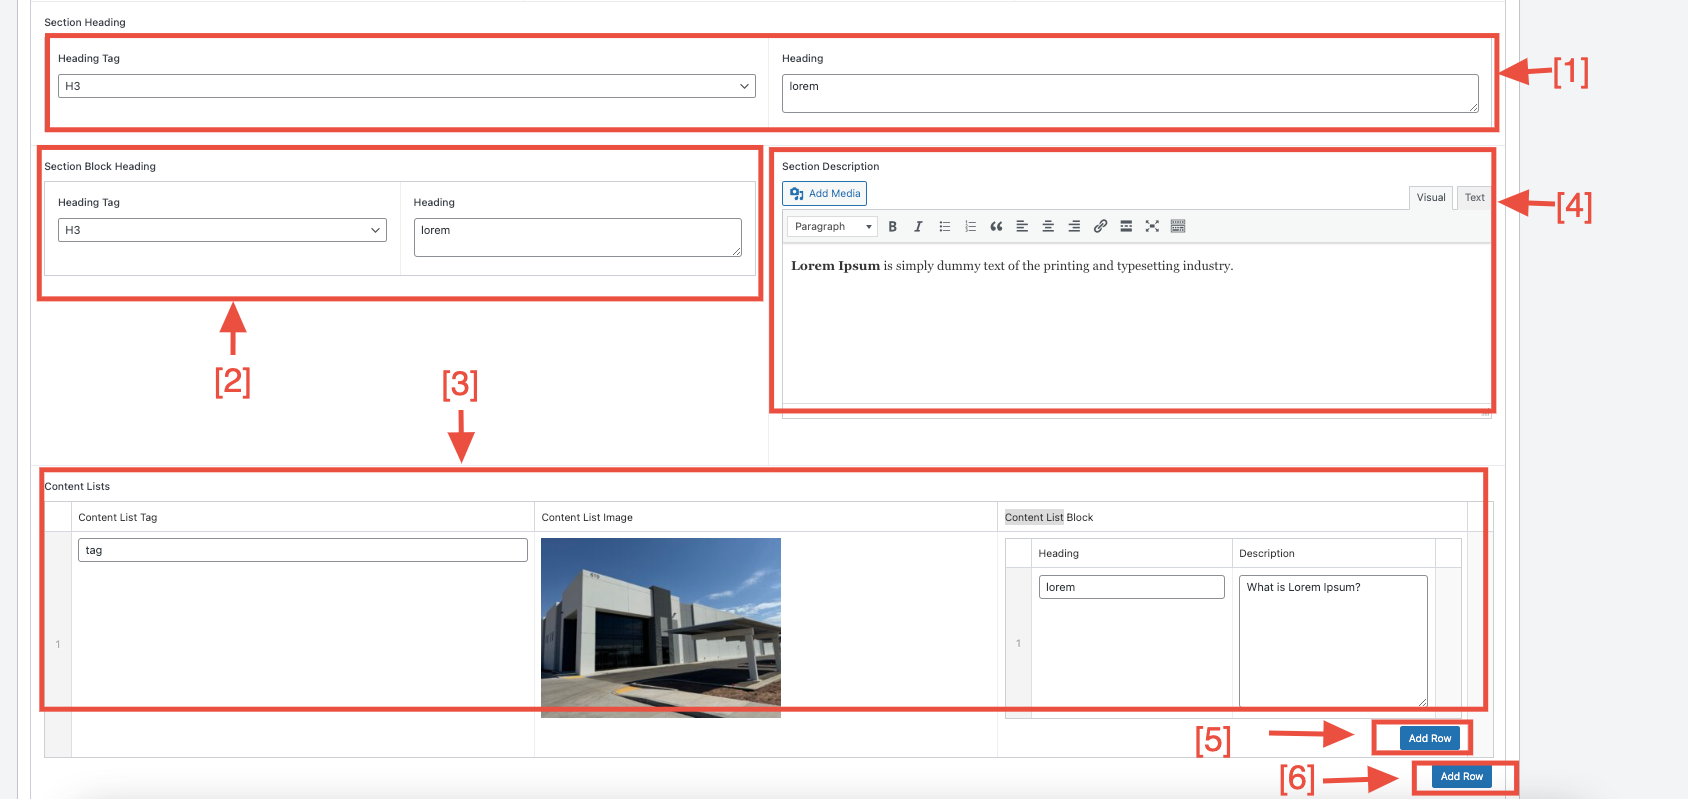
Content List Block Section
Steps
- Click on the "Textarea" to add a new heading. You can also select the dropdown to change the heading tag.
- Click on the "Textarea" to add a new section block heading. You can also select the dropdown to change the heading tag.
- Click on the "Textarea" to add a new section description.
- You can manage your content list data.
- Click on "Add Row" to add a new content list block.
- Click on "Add Row" to add a new content list row.
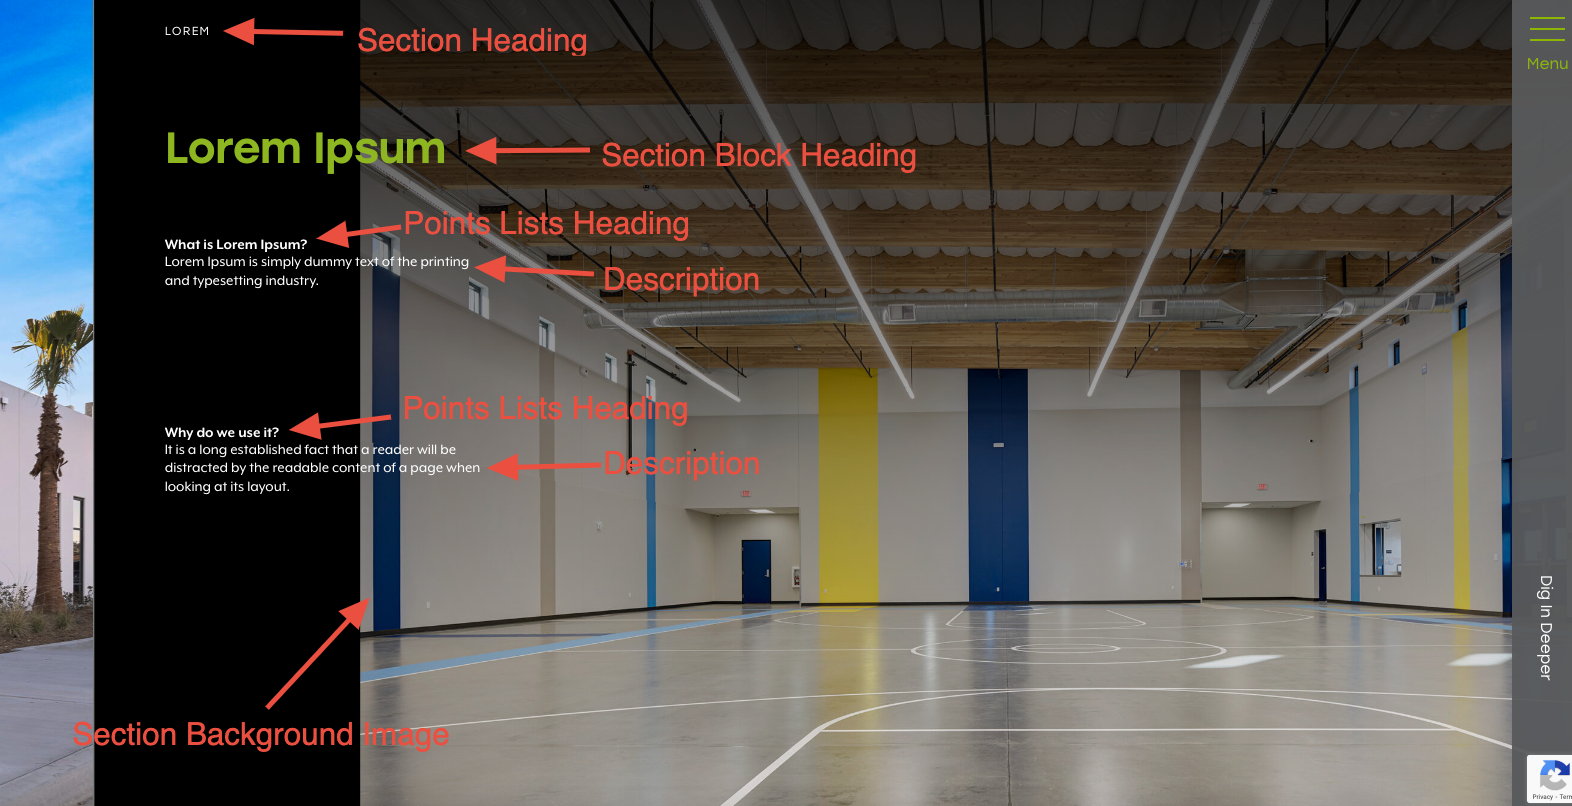
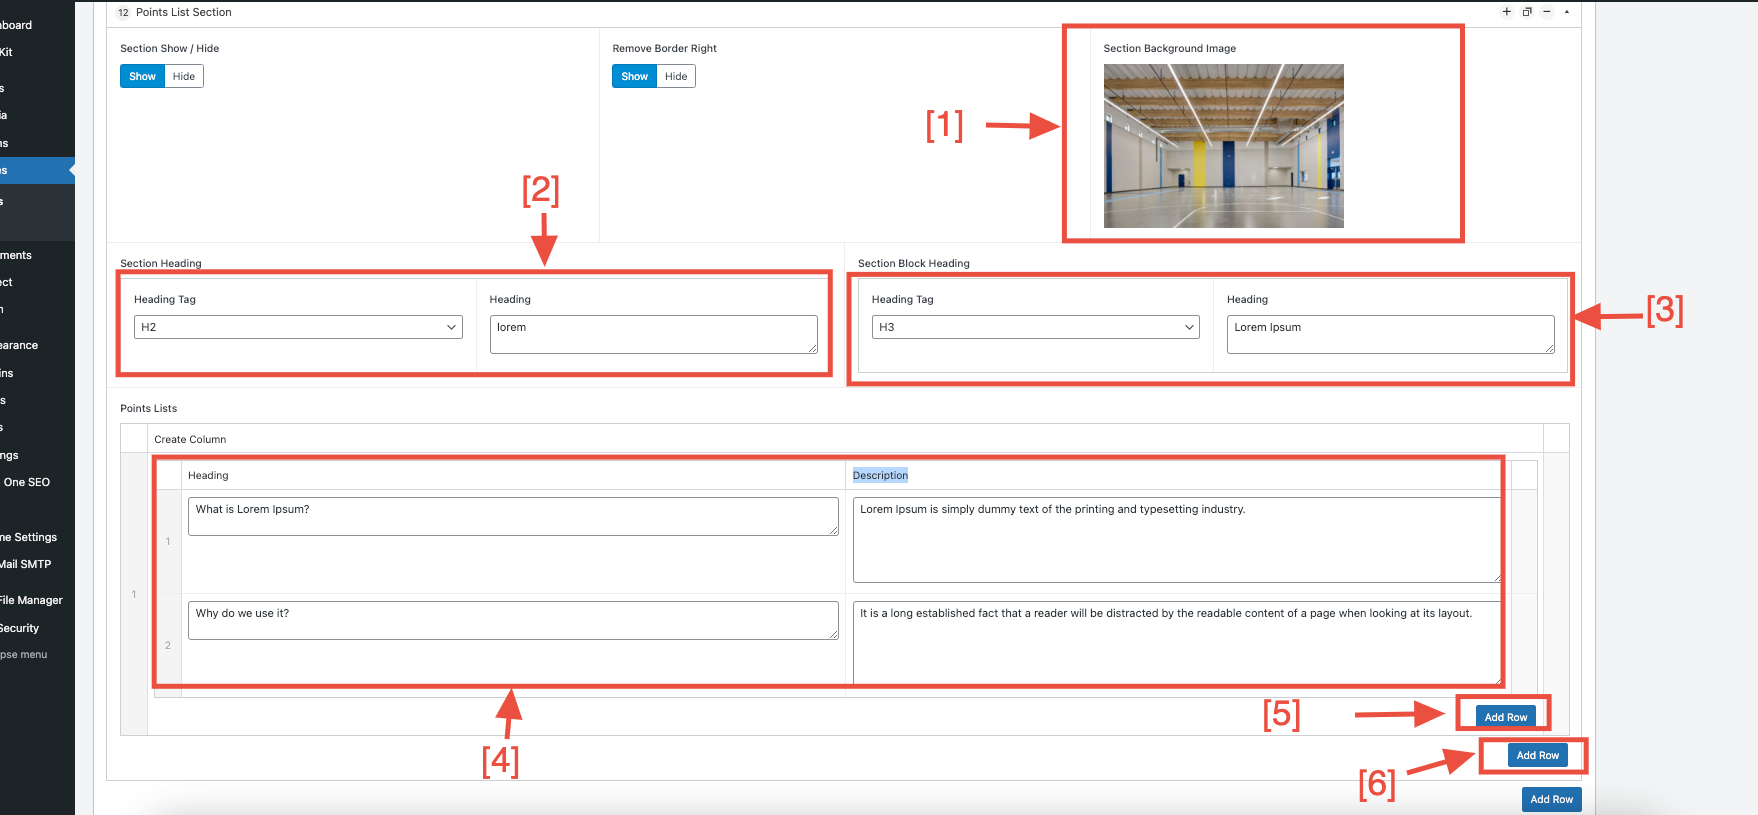
Points List Section
Steps
- You can change your background image.
- Click on the "Textarea" to add a new heading. Additionally, you can select the dropdown to change the heading tag.
- Click on the "Textarea" to add a new section block heading. Additionally, you can select the dropdown to change the heading tag.
- You can manage your points list data.
- Click on "Add Row" to create a new points list column row.
- Click on "Add Row" to add a new points list row.
Logo List Section
Steps
- Click on the "Textarea" to add a new heading. Additionally, you can select the dropdown to change the heading tag.
- Click on the "Textarea" to add a new section block heading. Additionally, you can select the dropdown to change the heading tag.
- Click on the "Textarea" to add a new section description.
- You can manage your list data.
- Click on "Add Row" to create a new logo list row.
Custom Post Types
Project Post Type
Steps
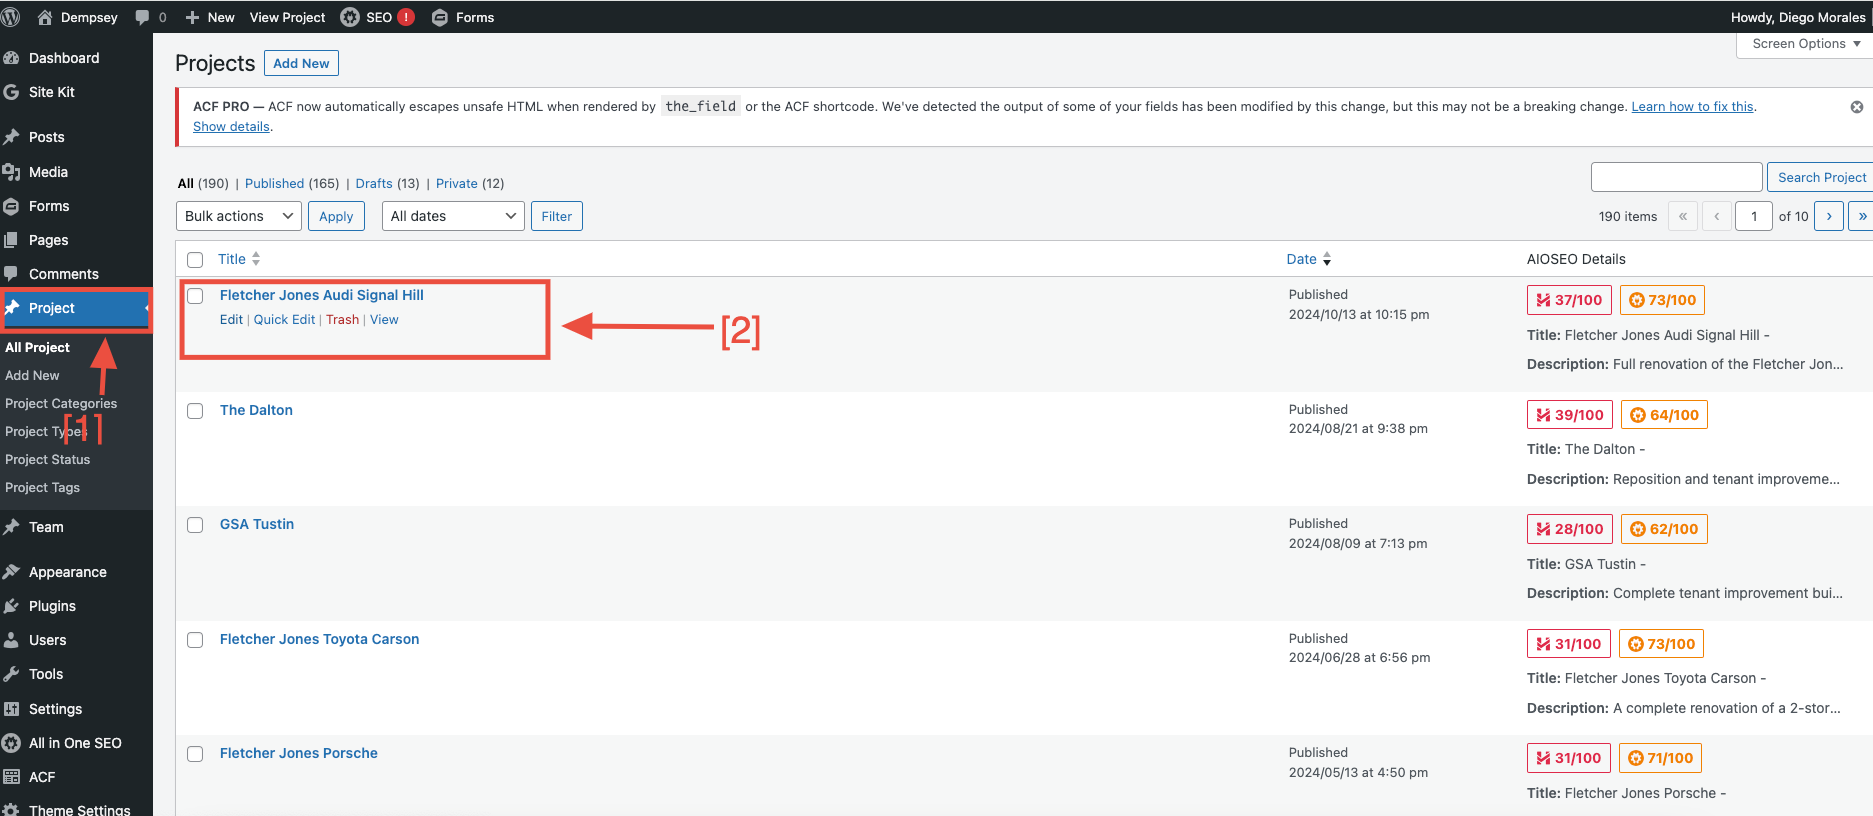
- Click on "Project."
- Click on "Edit."
Steps
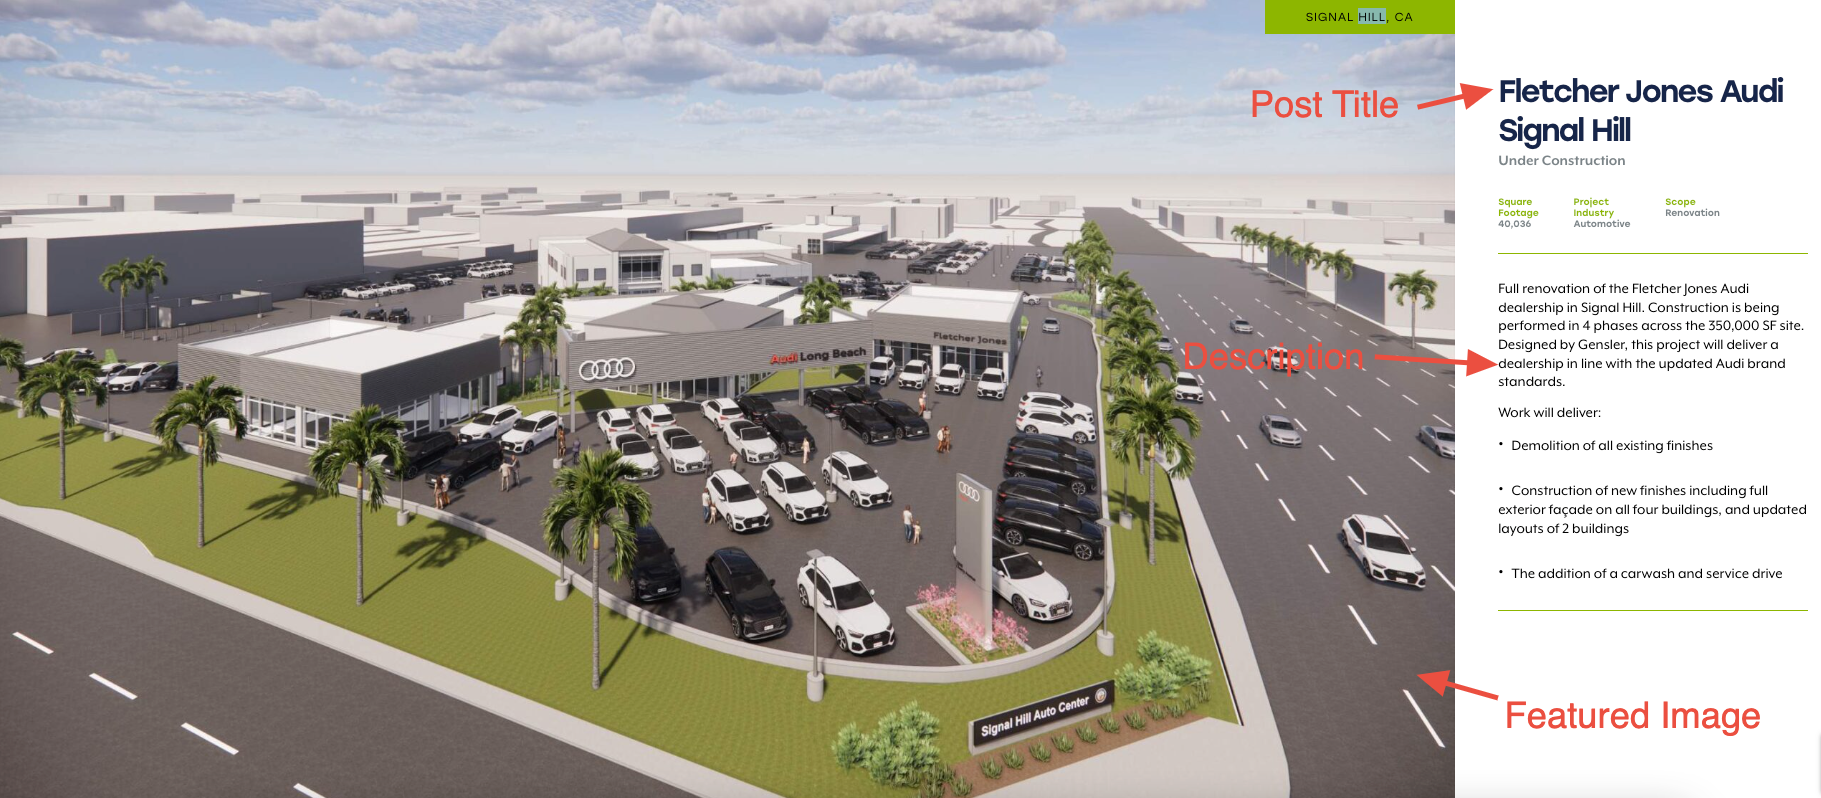
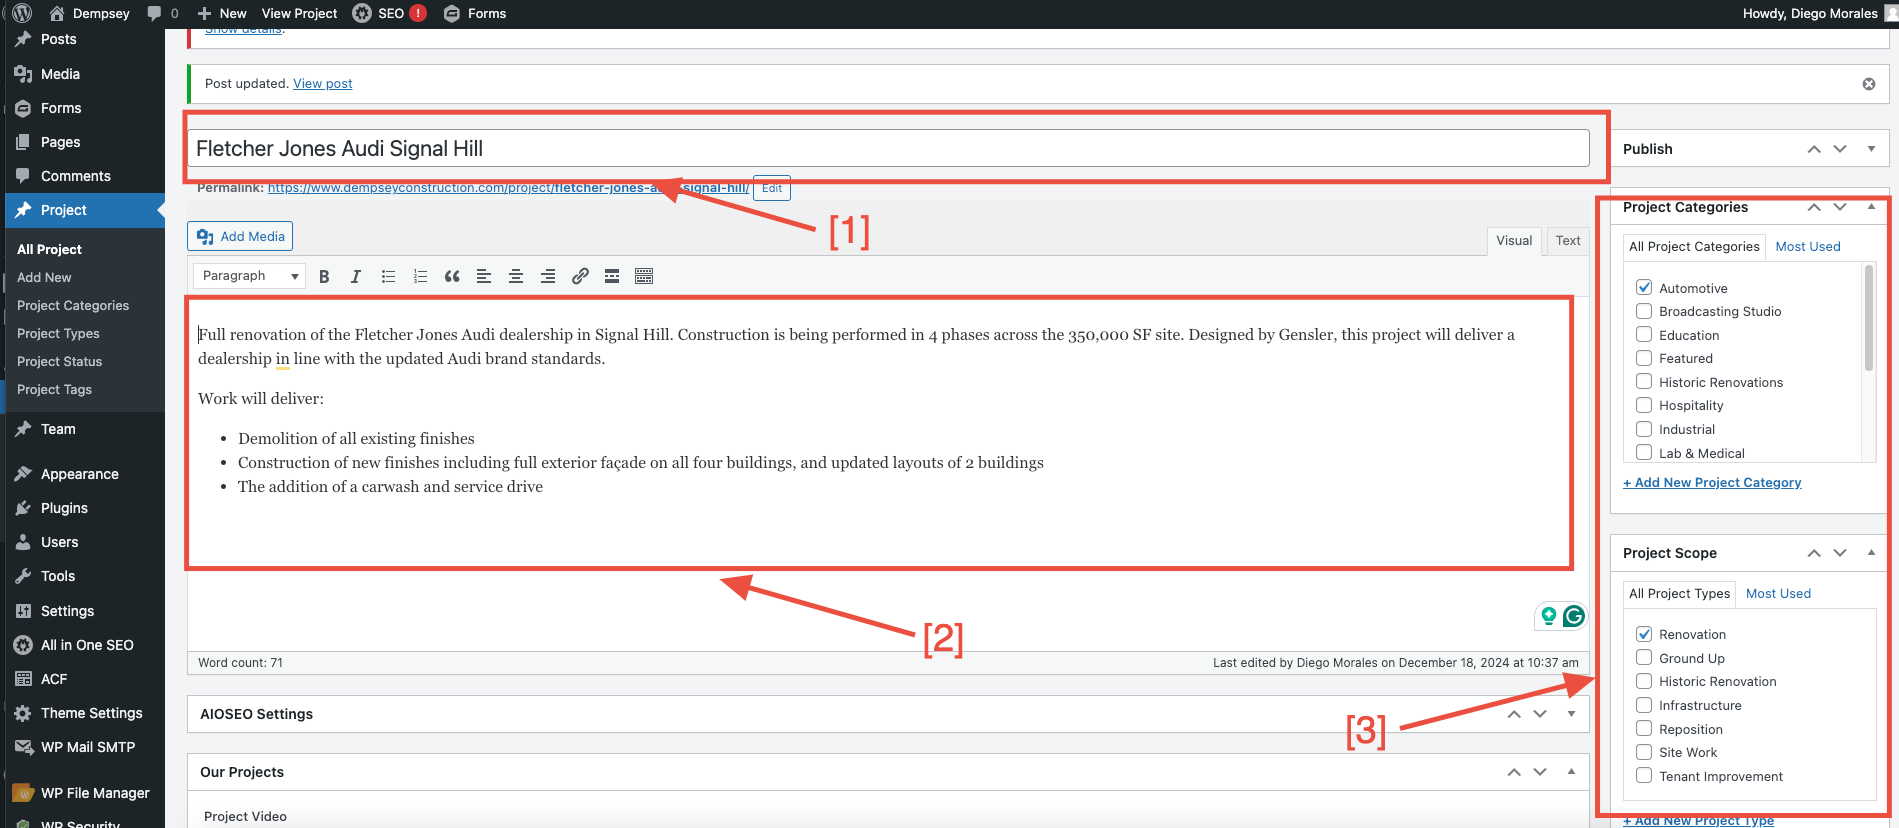
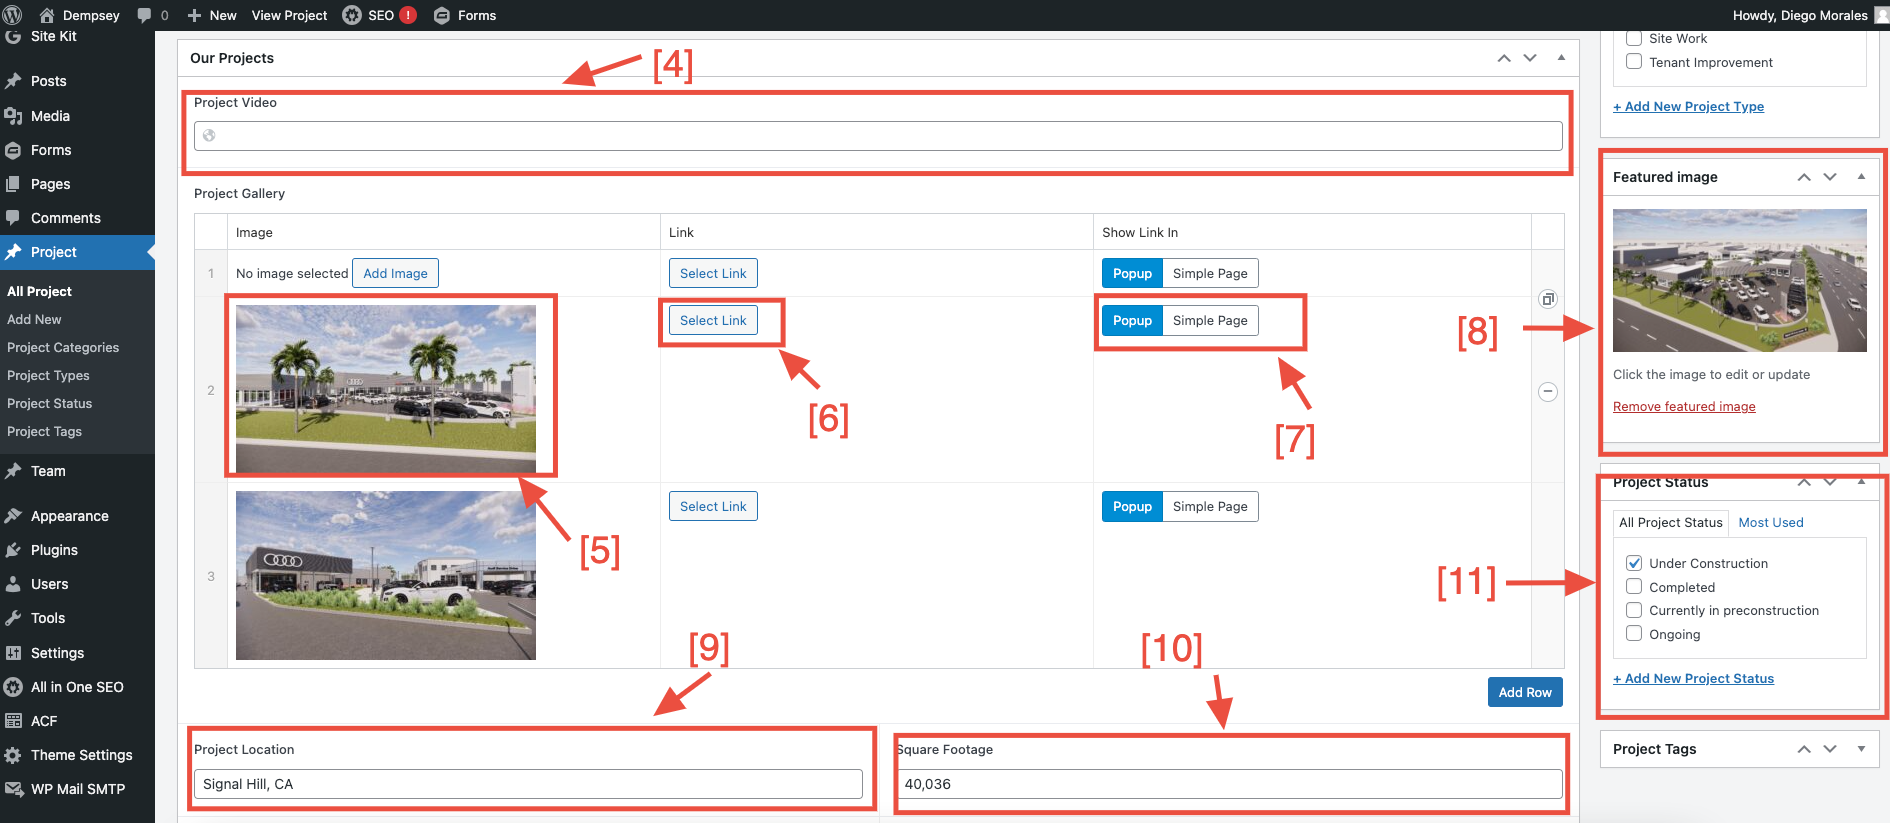
- Click on the "Textarea" to add a post title.
- Click on the "Textarea" to add a short description.
- Add the project industry and scope (view example).
- Click on the "Textarea" to add a video link (view example).
- Add gallery images (view example).
- Select a link to add a gallery link.
- Select the button group to display the link on a popup or a simple page.
- Use this field to add a featured image.
- Click on the "Textarea" to change the project location (view example).
- Click on the "Textarea" to change the square footage value (view example).
- Show the project status. If the status is set to "under construction," the post will appear on the under-construction page (view page).
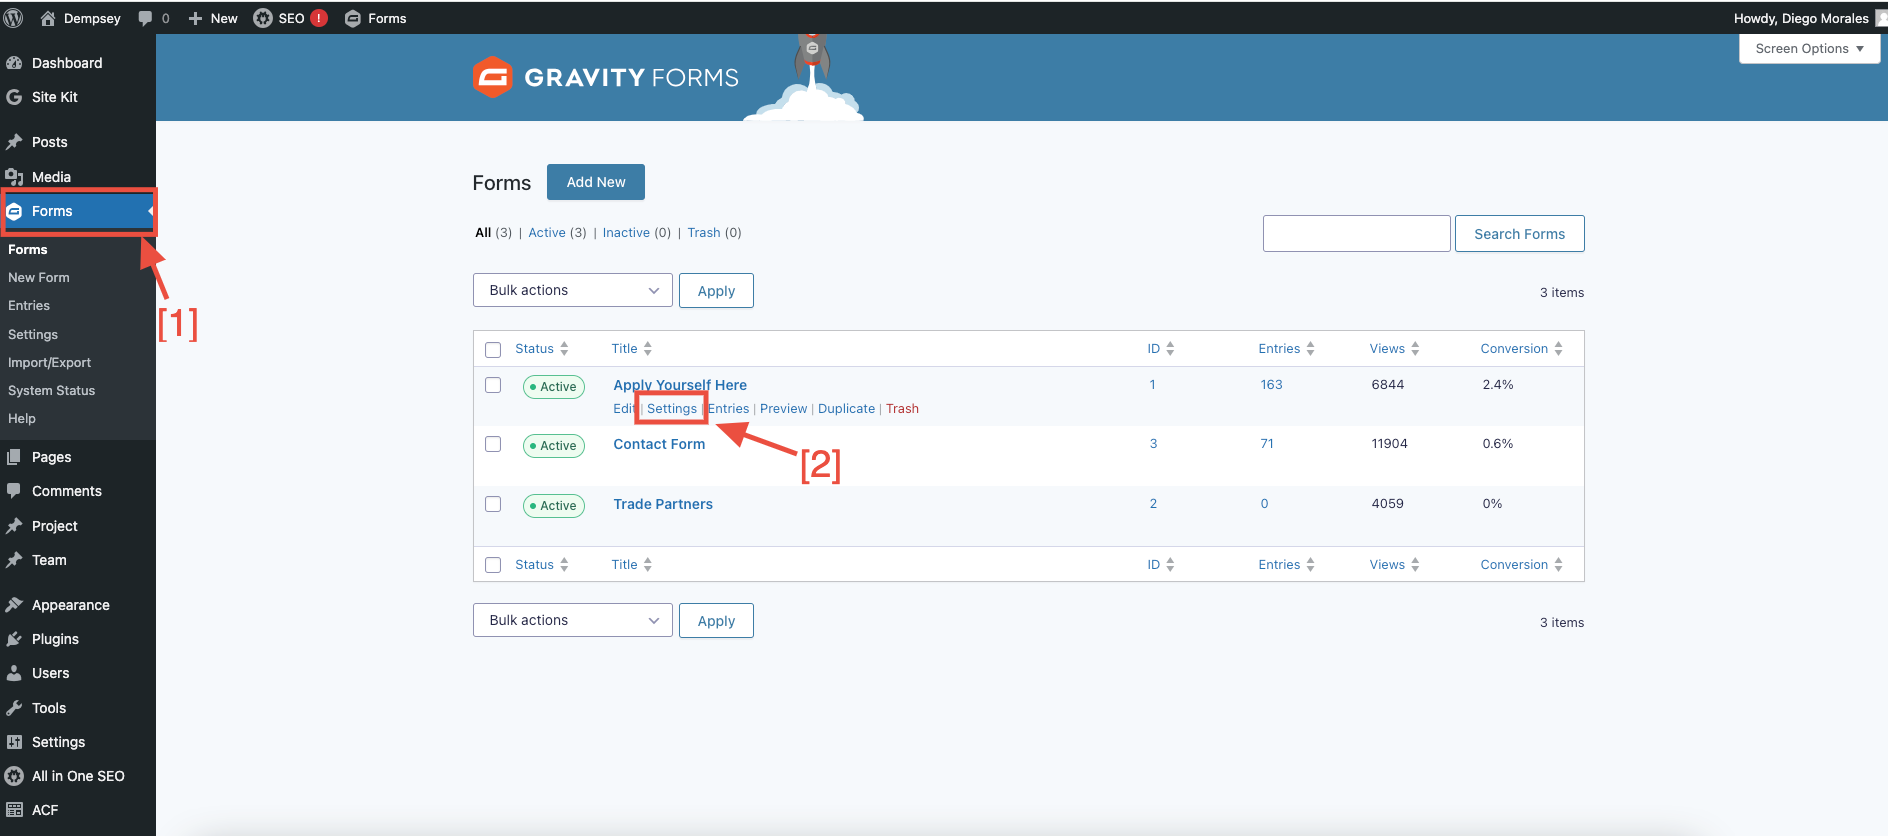
Team Post Type
Steps
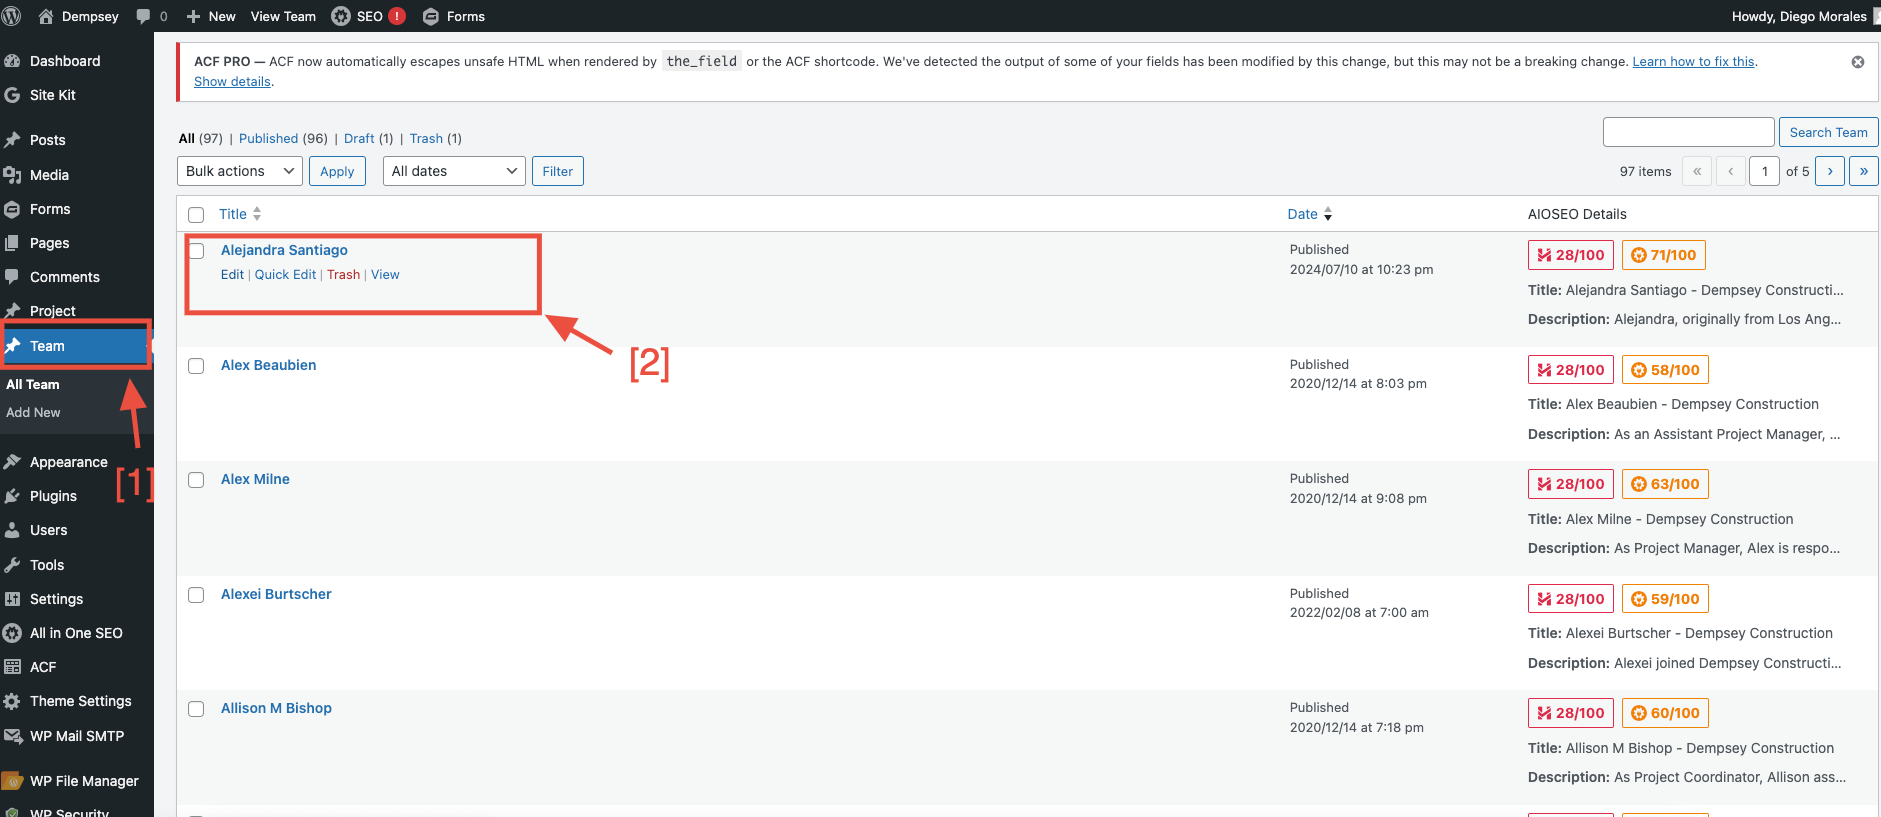
- Click on the "Team" post type.
- Click on "Edit."
Steps
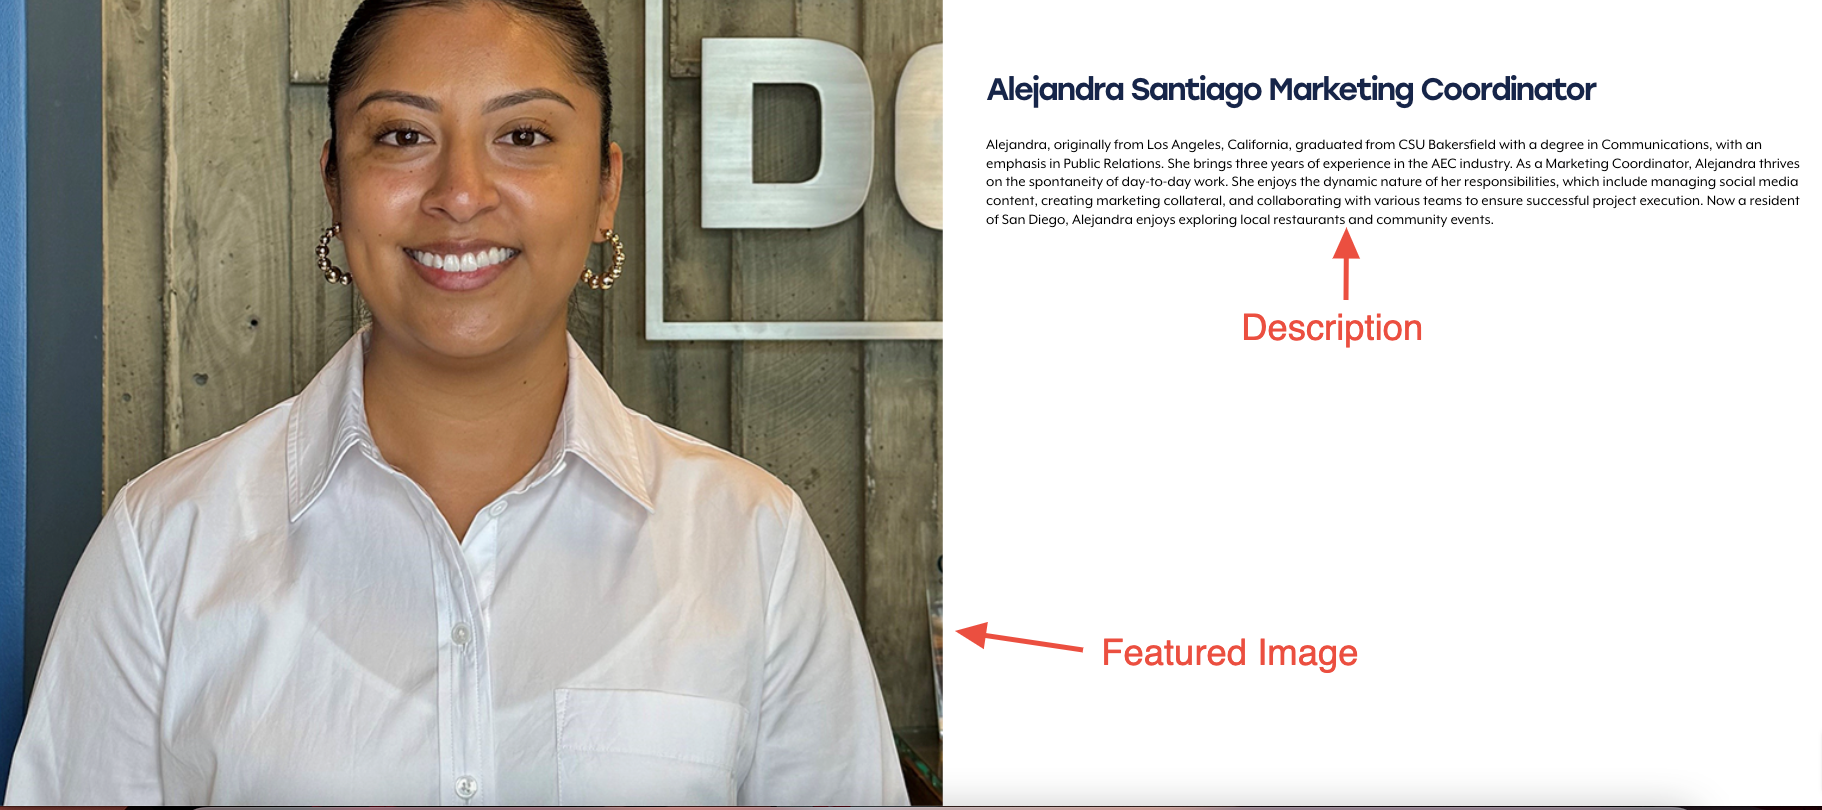
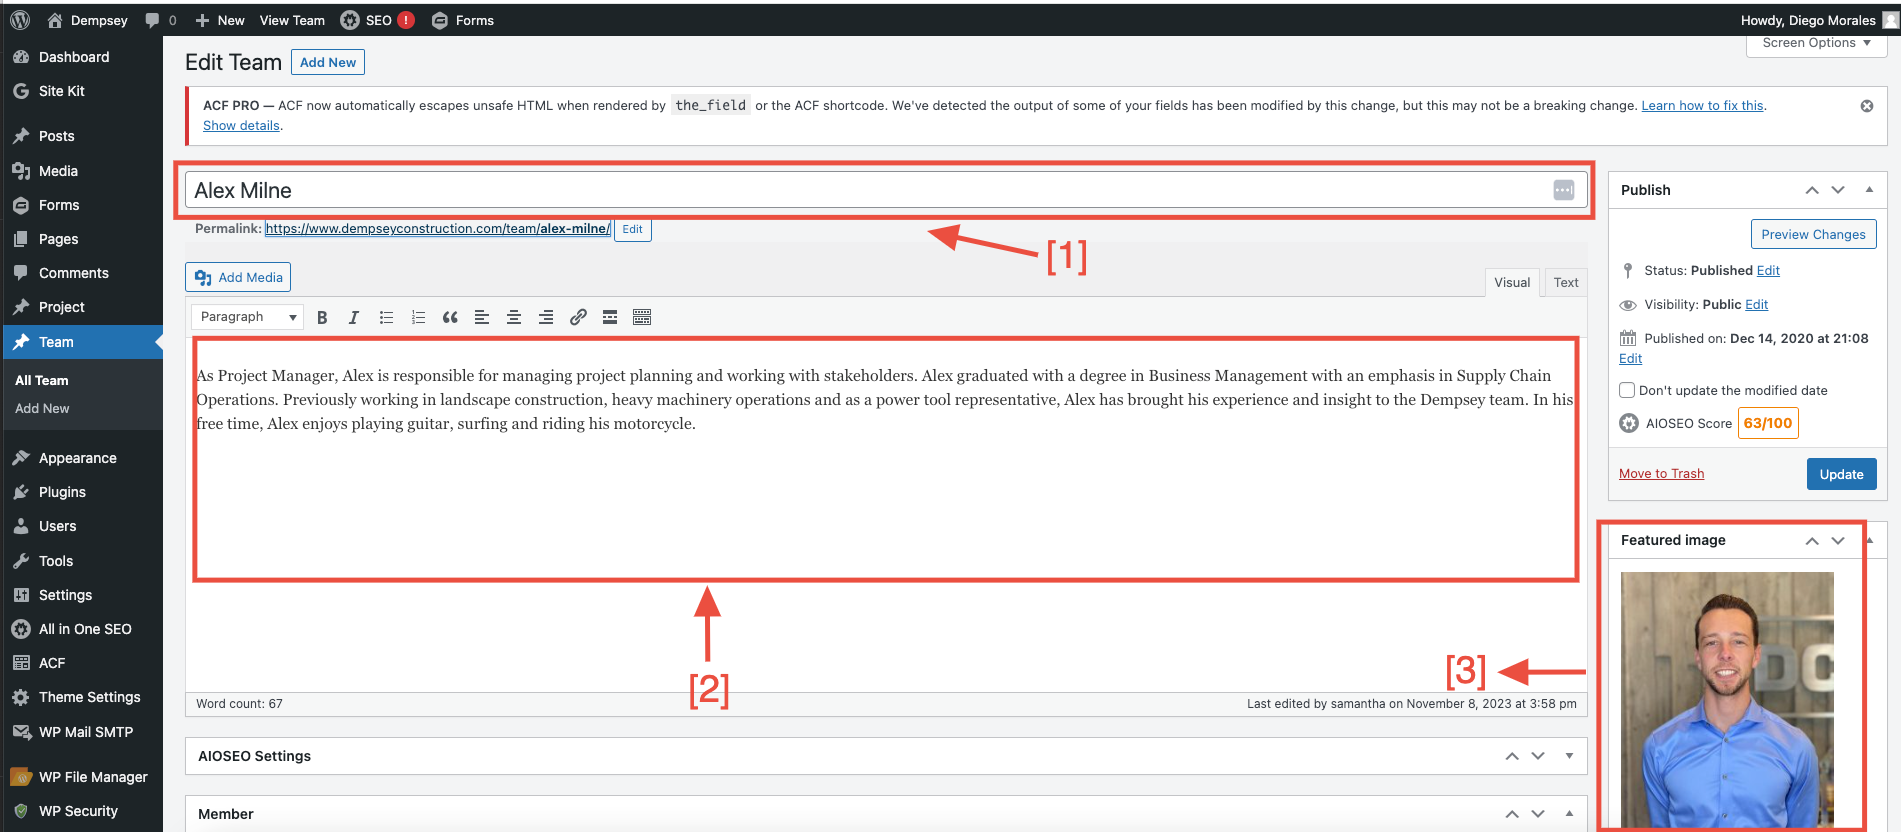
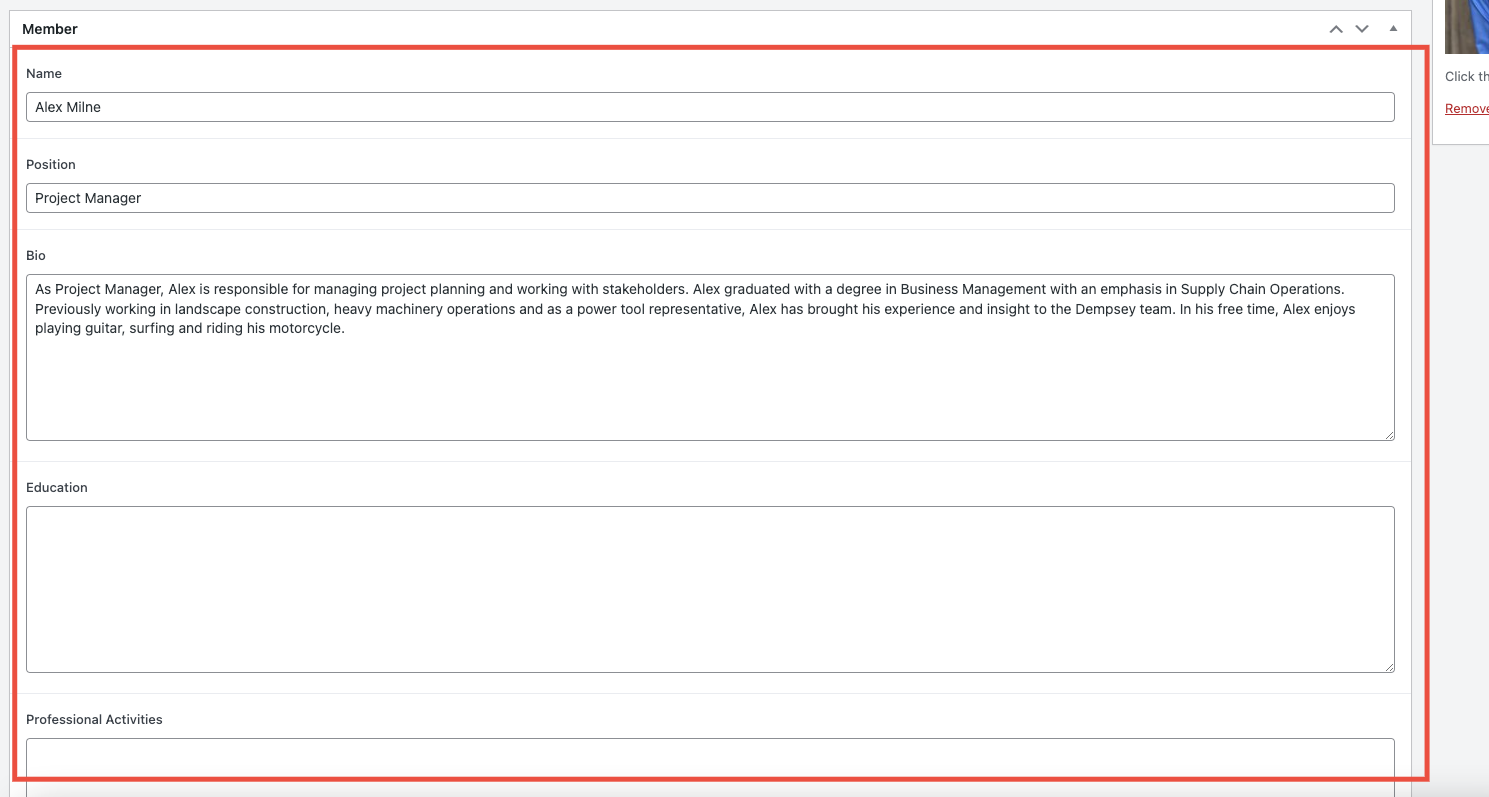
- Click on the "Textarea" to add your post title.
- Click on the "Textarea" to add a short description.
- Use this field to add a featured image.
- Use this field to add information about the team member.